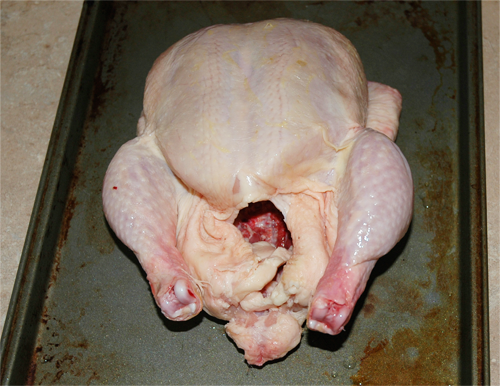
 I rarely buy chicken pieces separately. I do sometimes, like when I just want many of the same cut, like 20 chicken wings for example, and do not want to buy ten whole birds to obtain them. Typically, though, I get a couple of whole chickens each month, and cut them up myself. I remember a time when it seemed like it would be impossible to get all those nice neat cuts out of a whole chicken, but I was wrong. It only takes a couple of minutes, and it is usually cheaper than buying the parts separately, plus you get the carcass which you can use to make stock! I always cut my chicken in such a way as to create boneless breasts. Many videos I see online show people cutting the breast plate in half and leaving it attached to the breast. I suppose this can be desirable for certain uses, but I find boneless chicken breasts far more desirable. Think about it. When you buy chicken breasts, do you look for boneless breasts, or breasts with a bunch of bones and cartilage attached? I have attempted to make this guide clear enough for anyone to understand, so if this is your first time I hope that it is helpful to you. Step 1: Debreasting You can start with the leg quarters or wings if you wish. There is no correct order, but the order I present in this guide is the order that makes the most sense to me. By starting with the breast, you still have the legs in place to help keep the bird stable so that it does not wiggle around during debreasting, and then when you move on to the leg quarters you do not have all that breast meat in the way. So really, the order of these steps is arbitrary. It is my preferred order of operations. I just wanted to make that clear to you. The breasts are made up of all of the meat in the front (or the top, if it is laying down on its back) of the bird. There are two breasts that are separated from each other by a cartilage and bone breast plate that runs directly down the center of the breast area.
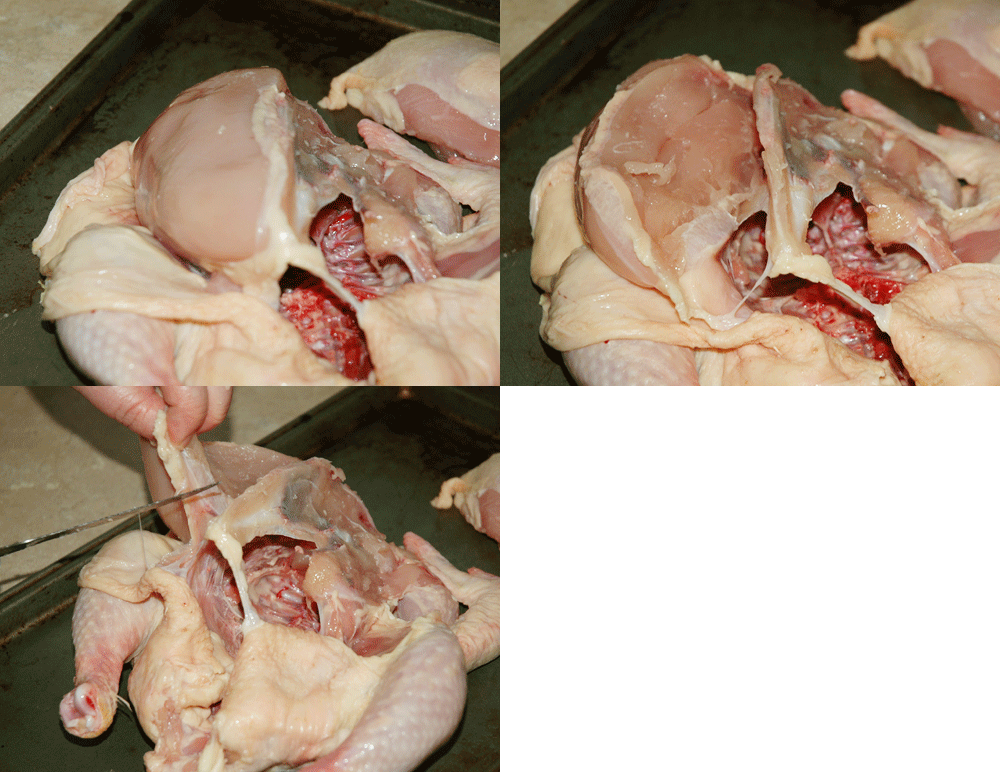
  To remove the breast meat, begin by making an incision straight down the center of the breast area. This will cut the skin and reveal the top of the wedge shaped breast plate. Now, you can choose to proceed in one of two ways. You can remove the breasts with the skin attached, or you can peel the skin back before you remove the breasts. I usually peel the skin back and then remove the breasts because I usually want my breasts skinless and it is also little easier to cut out the breast meat when the skin is pulled back. There are times, however when you might want to skin attached, so I will show you both ways. First I will remove the right breast with the skin still attached. So after you have made your first incision down the center of the breast simply continue to make cuts down the side of the breast plate, following the bone. Basically the action is less of a “cut” and more like scraping the flesh from the bone.
 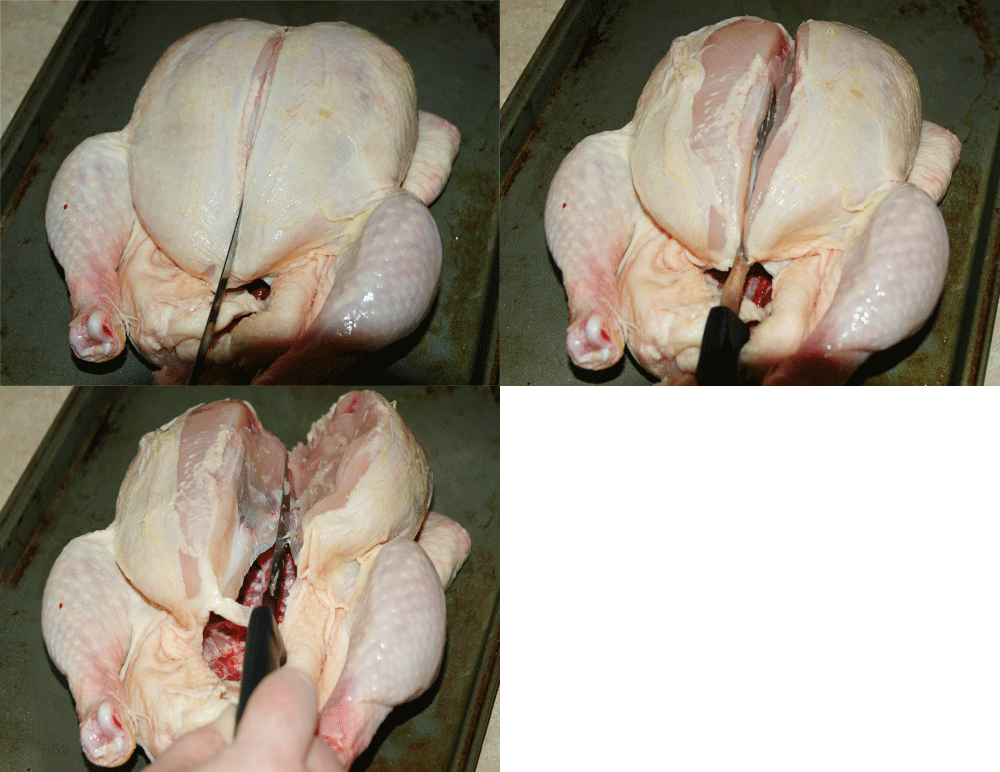 Once you have cut all the way down the breast plate and hit the ribs, The breast will be attached to the bird by a thin bit of meat and skin along the edge of the breast. This is best reached by changing the angle of your knife to cut straight up the body against the ribs while lifting the breast as it comes off.
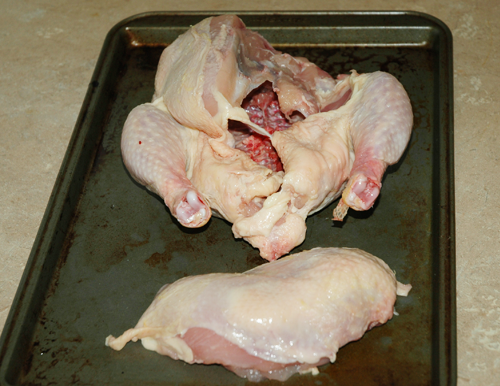
  Now you have a skin-on, boneless breast.
  Before removing the other breast I will remove the skin. This is easy. It often pulls away almost effortlessly, but sometimes the first bit of the connective tissue is a little hard to rip by hand, so if that is the case simply use your knife to slice it and the rest of the skin will pull away easily.
 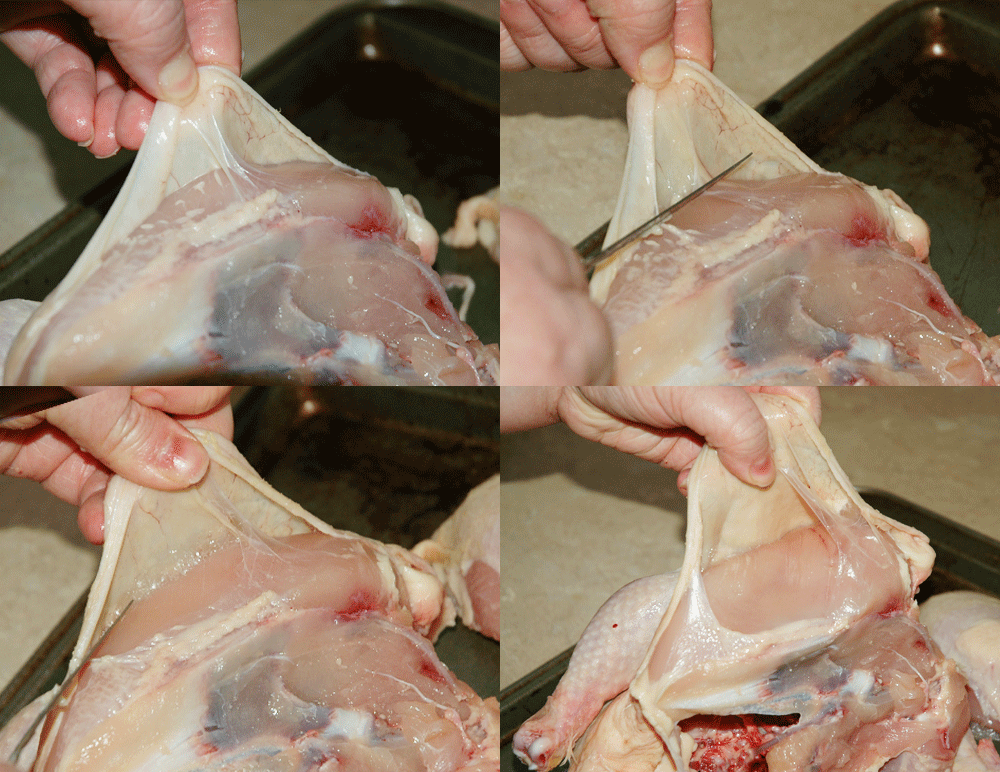 Pull the skin all the way back to expose the entire breast. Now you can scrape the breast away from the breast bone just like you did with the other breast, and when it come time to cut the last thin bit off from the other side it will be a little easier than when the skin was on because you can clearly see where the breast meat begins and ends.
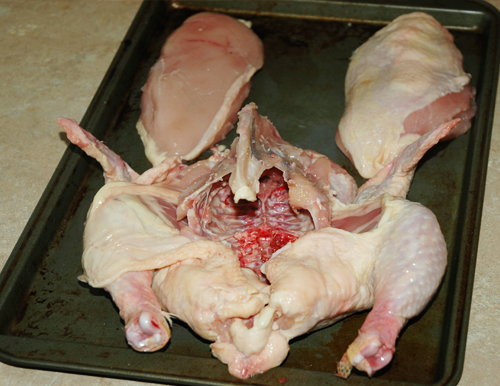
  Now we have a skinless,bonless breast as well as a skin-on, boneless breast.
  Step 2: Removing Leg Quarters The leg quarters are a piece that includes the drumstick (leg) and thigh.
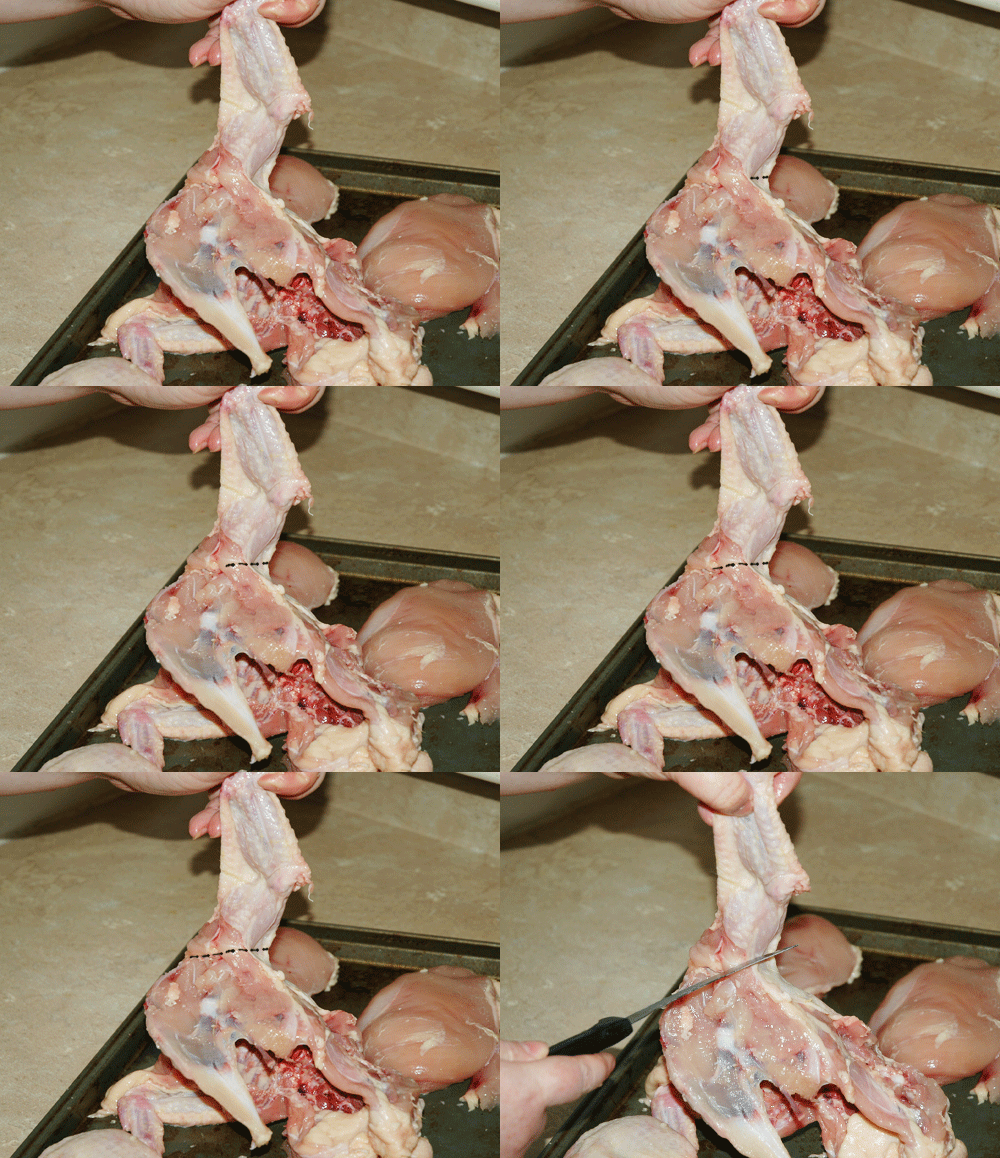
 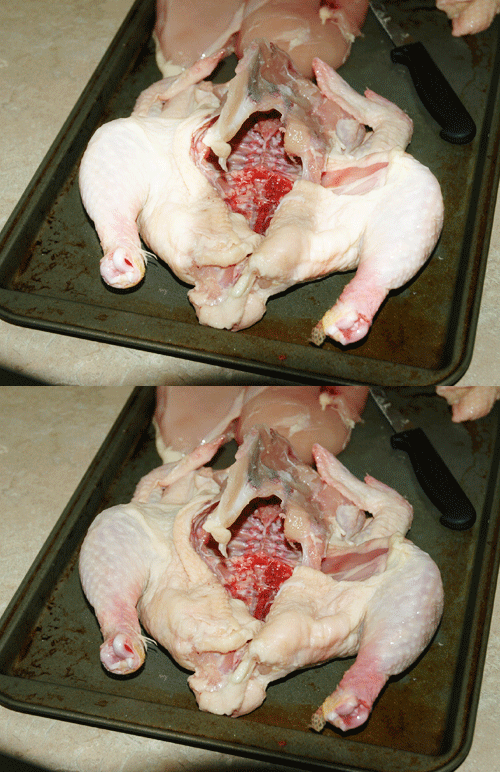 Begin by bending the legs far back to dislocate the hip joint. The tip of the thigh bone will often pop out and be visible. It did not show through the meat in this shot so I just highlighted where the end of the bone is.
 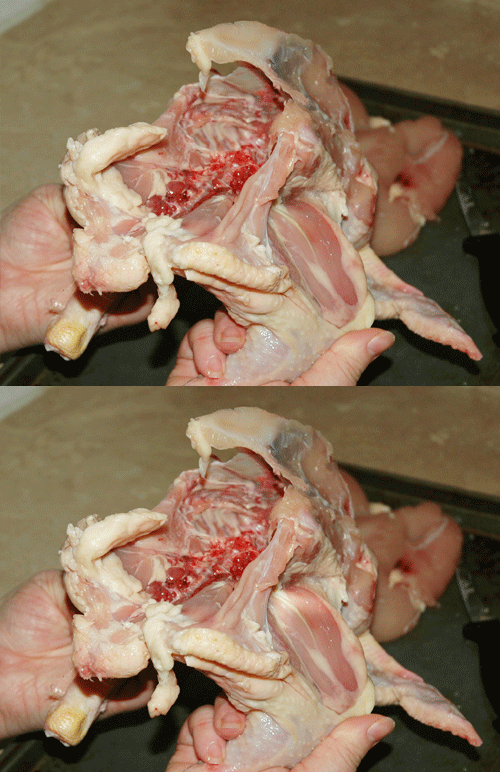 I like to hold the bird by the leg to cut off the leg quarter. Simply start at the bottom of the thigh, by the tail, and cut straight up, following the body toward to wing. The knife should slip right past the hip joint easily since the thigh bone has been dislocated.
  Here on the other side the dislocated thigh bone is visible. I drew a line across the cutting path to make it clear.
  Step 3: Remove Wings The last pieces to remove are the wings.
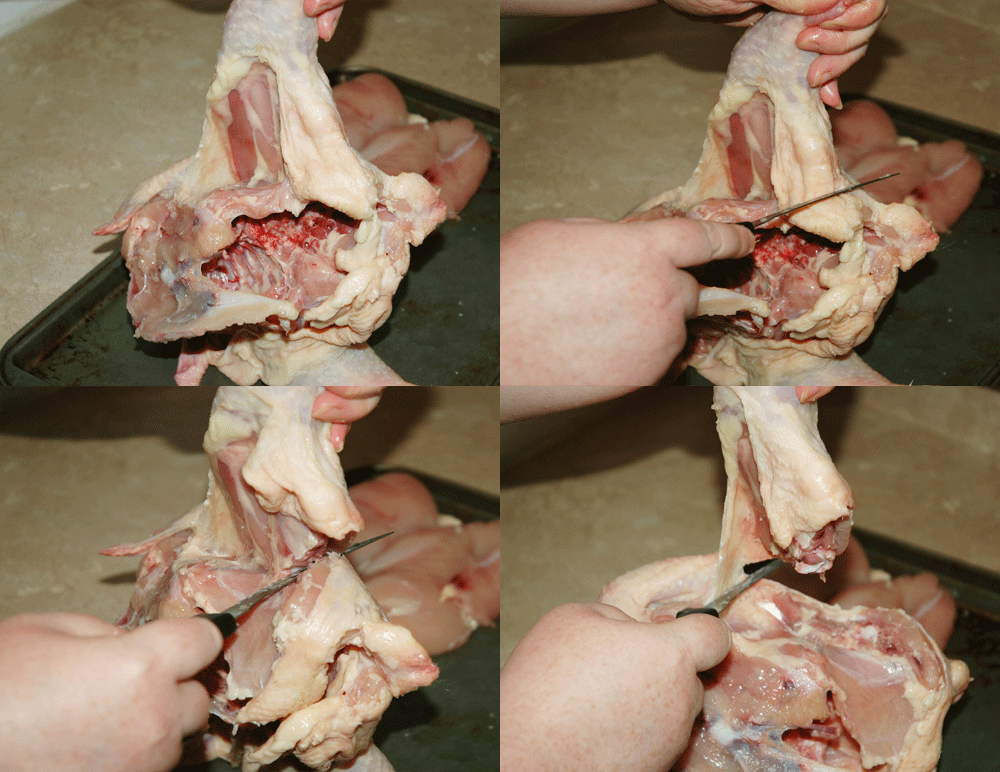
  Hold the bird up by the wing and start in the “armpit”. Cut straight up toward the shoulder and you should slip right through the joint. If you have any trouble finding the joint you can simply dislocate it like you did with the thighs and it will be easier to find your way between the bones.
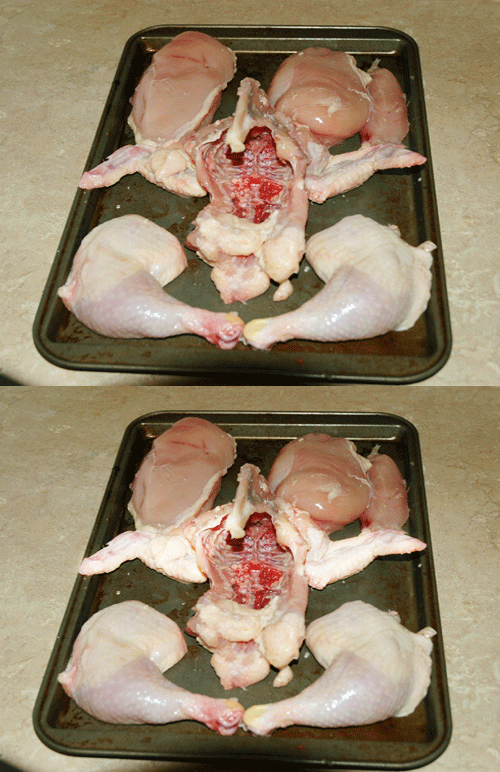
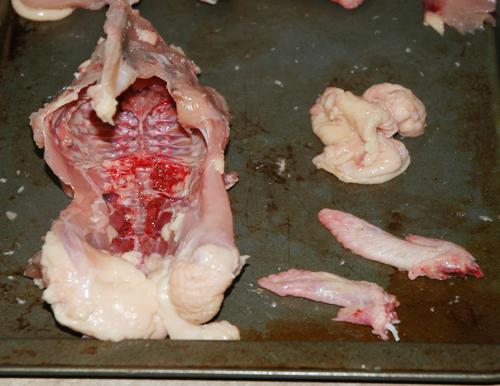
  Now you have your basic pieces. Breasts, leg quarters, and wings, as well as the carcass which should be reserved to make stock. (Note that the breast in the image are both skinless, but later in the article I will be using the skin-on breast again. I did things a little out of order so that is why there is this continuity error.)
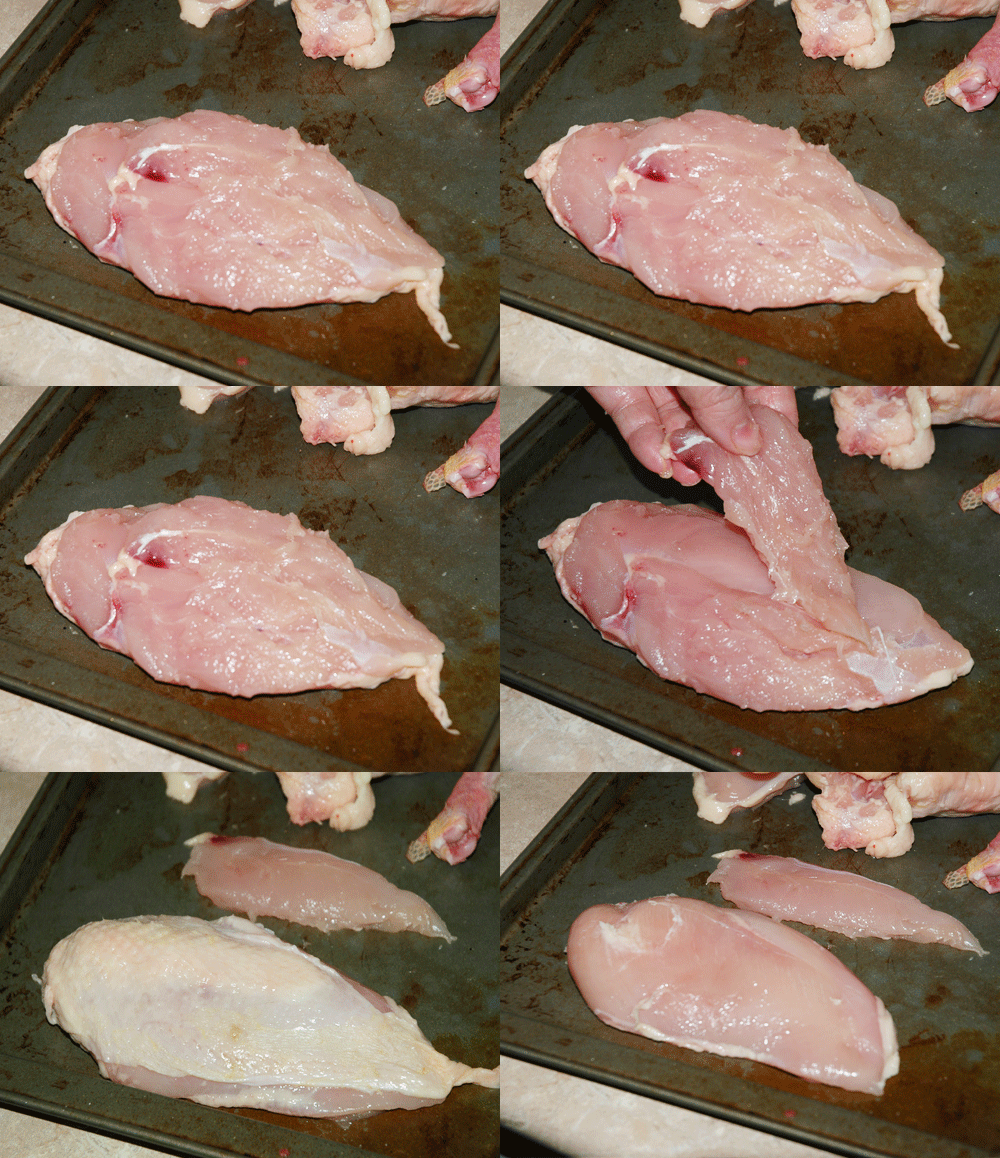
 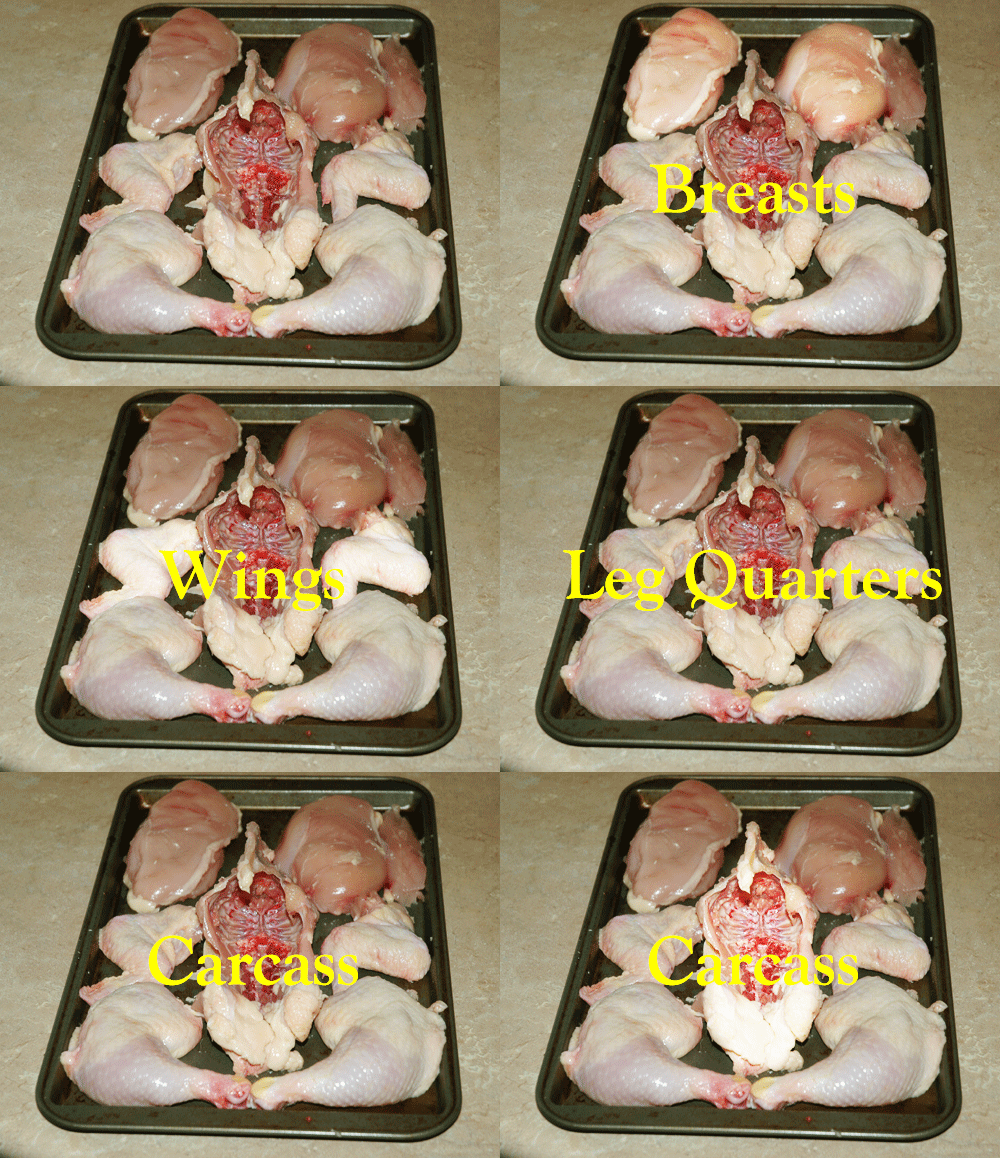 Each piece can be further broken down as I will illustrate. Each breast is actually made of two pieces; the breast and the tenderloin. Looking at the breast on the rough side, or the side that you scraped off of the breast plate, you will see an extra flap of meat. If you simply pull on the extra flap it will tear off neatly. This small piece of breast meat is the tenderloin, or sometimes it is just referred to as the “chicken tender”. In the animation below, after I remove the tenderloin I flip the breast over to expose the side with the skin. If you would like to remove the skin after cutting the breast off of the bird, simply pull it off. It will come off easily.
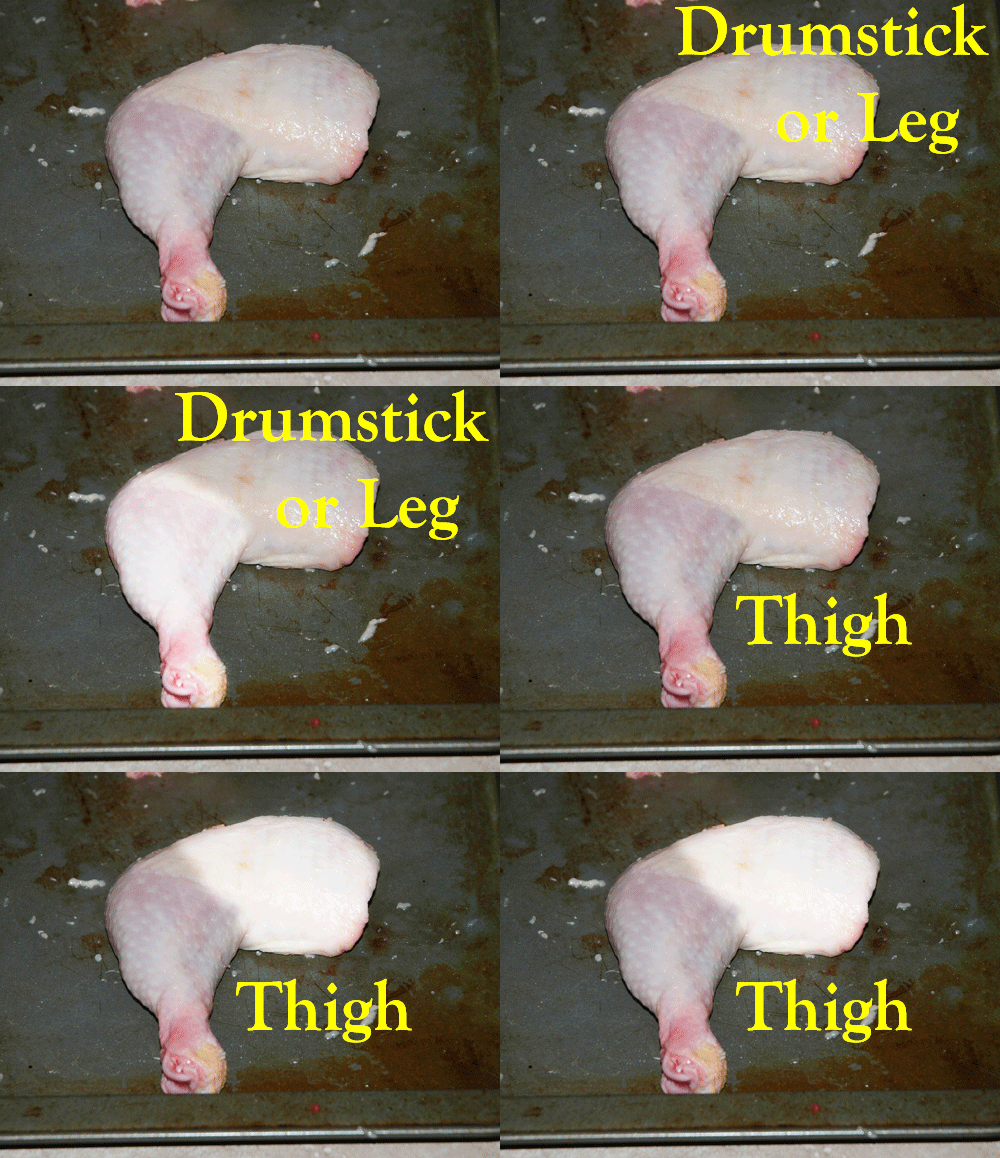
  The leg quarters are made up of two pieces; the drumstick and thigh.
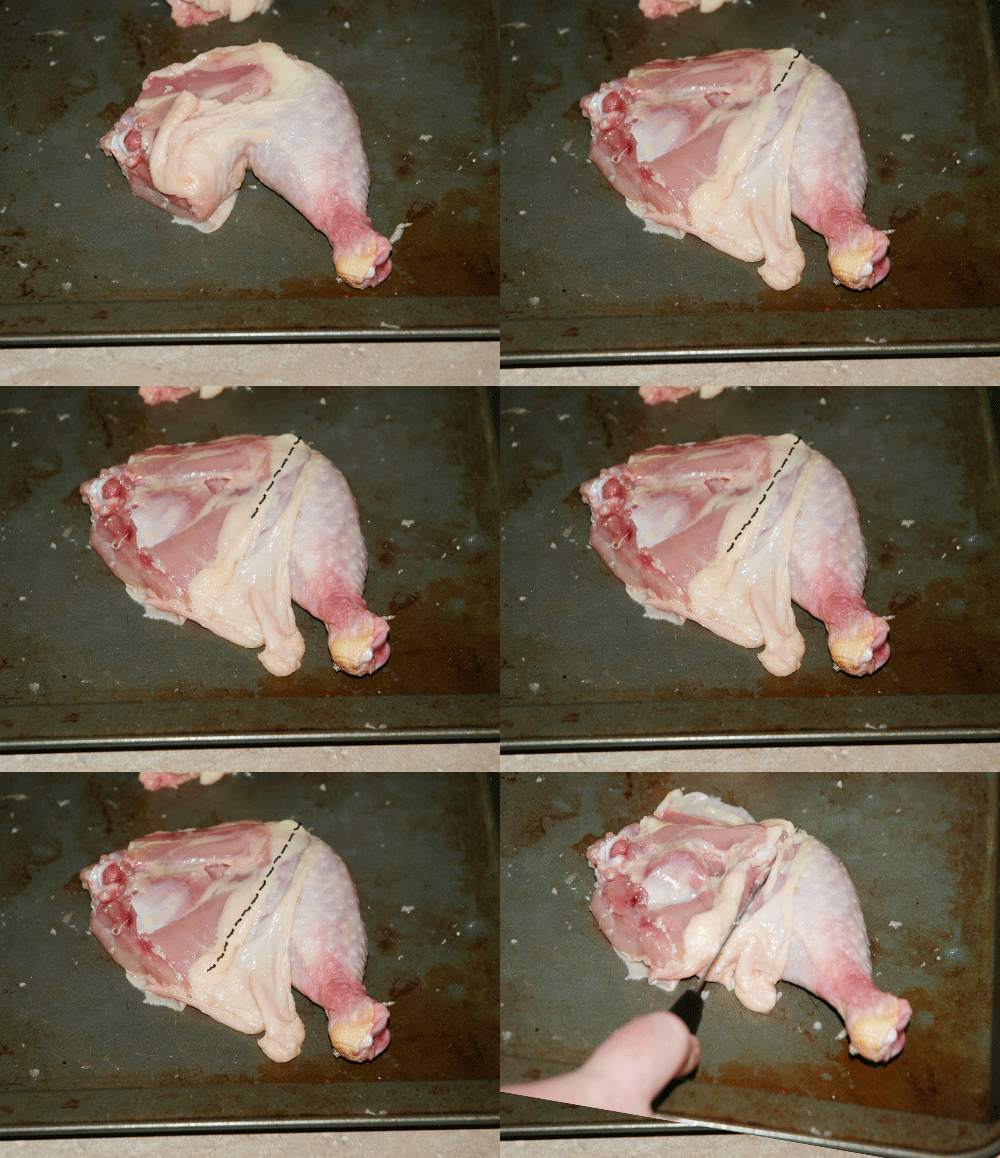
  To separate the two piece you simply have to cut through the knee joint. There is a trick to this. If you turn the leg quarter over to the rough side and peel the skin back a little you will find a band of fat running down along the knee. This is a perfect mark for where you should cut. If you cut directly through the middle of the fat line you should glide right through the joint. You probably will not have any trouble and won’t even have to dislocate the joint to find your mark.
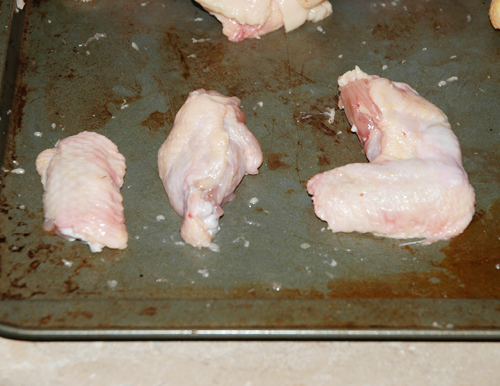
  The wings are made of three parts; the drumette, the wingette, and the wing tip.
  Cut through each joint, dislocating if necessary. Keep the drumette and wingette, and either discard the wing tip or reserve it for stock. You can also choose to only remove the wing tip and leave the wingette and drumette attached to each other. Both options are shown in the following image.
  Now you know how to make most cuts of chicken. Each piece I have illustrated is shown below. Whatever I am not using right away I freeze on a plate or pan lined with tin foil so that it does not freeze to the pan. Once each piece is fully frozen I place them into freezer bags which are designated for each cut. The breasts are often used within a few days, so there is not typically a collection of them, but the other pieces, I often collect until there are enough to use. For instance a good serving of chicken tenders is about three to four pieces, so I wait until I cut up enough chickens to acquire enough to serve two people. Since I typically cut up two to three chickens in a month I will have enough chicken tenders with which to make a meal every month or two. I do the same with the wings. Drumsticks and thighs are used as needed. Save as many pieces as you want for as long as you want, but try to use any given piece within four months because this is when freezer burn will start to ruin the meat. You can store the meat longer, however, if you use a vacuum sealer.
  Of course you also have the carcass and wing tips, and maybe some extra skin to use to make stock. I like to save these in the freezer until I have broken down two or three chickens and then make a nice big batch of stock.
Loading

Pingback: Chicken Stock Cubes | The Cooking Geek()
Pingback: Video Added to “How to Cut Up a Chicken” | The Cooking Geek()
Pingback: Chicken Breast with Reduction and Onions | The Cooking Geek()