
Jump to Ingredients – Jump to Method – Jump to Printable Version
 I make bread (a triple batch) around once every month or two. I usually make whole wheat bread, but sometimes I make white bread as a treat, or because I intend to use it for a specific recipe. White bread can be very simple. A fantastic pan loaf can be made with simply flour, water, and yeast. Since I do not make it often, however, when I do make it, I like to make more than just basic white bread. This is still a simple bread recipe. It is just a bit enhanced to create an amazing tasting, soft, and fluffy loaf of bread. Store bought white bread, that tastes like air and smells like pretty much nothing, is no comparison. This bread can be used for anything you would typically use store bought white bread for. Even fussy bread eaters who only want wonder bread will likely love it. It is simply scrumptious!
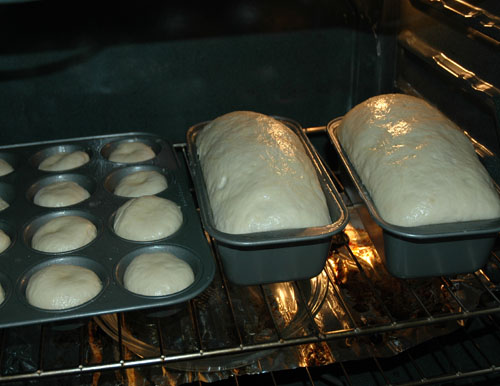
The recipe for the dough for this bread can be found here. Please follow that entire recipe, and once the dough has risen, as it did at the end of that recipe, you can come back here and use this guide to finish the job. If you made the full triple batch of dough, then you can make as many as three of these loaves, but if you made only a third of that recipe, or if you are doing something else with the rest of the dough you will obviously only make one loaf. It is totally up to you. Today I am making two pan loaves and a tray of “bread muffins”, basically just little rolls cooked in a muffin tray.
-Ingredients-
approximately 1.5 pounds Soft White Bread Dough
Again, the recipe for the bread dough can be found here. You will be ready to begin this portion of the recipe when all steps in that guide are complete. In the picture you can see that I am cutting the whole triple batch of dough into three roughly equal pieces. These will be somewhere close to 1.5 pounds and that is good enough. It does not have to be perfect.

melted Butter
For coating pans and, if desired, the loaves. Preferably unsalted butter. It does not have to be a tablespoon like in the picture. Just use as much or as little as you need

-Method-
You will now shape about 1.5 pounds worth of dough into a loaf. In the picture below you can see the dough directly after it had been cut from a larger mound of dough. See the structure of the dough? See the skin? Keep this in mind when shaping the loaf. You want a smooth, unbroken skin all along the surface of your shaped loaf.
 There are many ways you can form a pan loaf. This is only one way and you can feel free to use a different method if you prefer. I have a few different methods that I switch between. There are few things in the world that are as fun to play with as bread dough, so just enjoy the experience of shaping the loaf, and however you end up doing it, the rest of the process is the same.
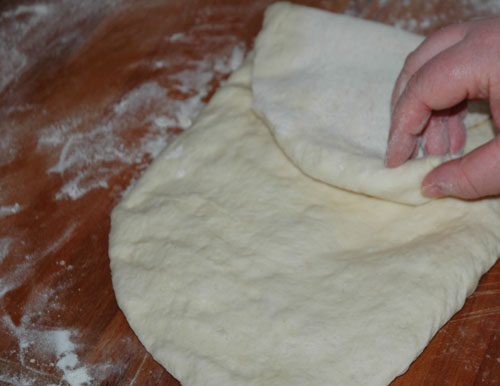
So, for this method, you first want to flatten and degas the dough, since it has just finished rising. You want to push out all those large air bubbles. Don’t be afraid to be a little rough with the dough. If you want you can even use a roller to help ring out some air. This is optional. Try to form the dough into a rough oval or rectangle shape while pressing it. If it looks absolutely nothing like these shapes it is OK. In that case simply degas it completely and fold all edges into the center, knead it a couple times, round it off, and give it a five minute bench rest. Then you will have a nice round mound of dough that you can again, flatten, and you will be able to form an easy oval with it.
 Fold one end into the center of the dough and press it down. Pinch the edges of this flap into the dough beneath it.
 Fold in the other side and press and pinch it down as before.
 Now fold the top of the dough (the edge farthest from you) about a third of the way down the rest of the dough and press in the edges once again.
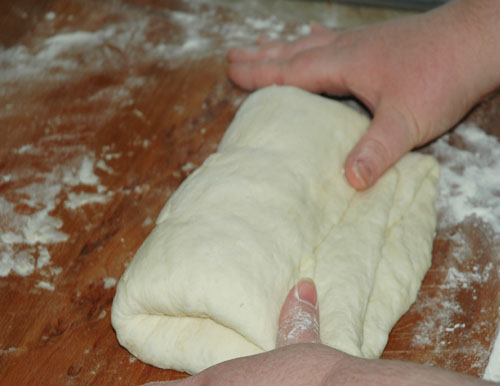 Roll the remaining dough up over the top of the loaf and press the edges in.
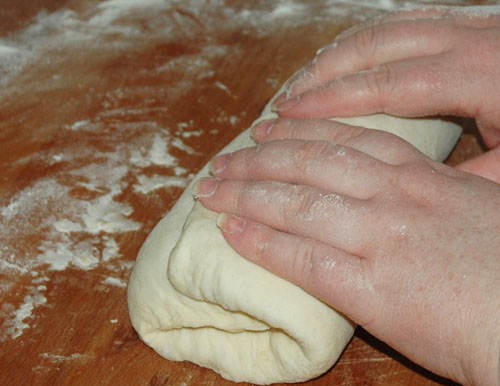 Flip the loaf so that the seam is on the bottom and pinch the edges down a bit. Be gentle and try not to tear the skin of the dough.
 Butter an 8×4 loaf pan and place the loaf inside. It should be just about a perfect fit. You want the edges to touch the sides all around the pan or at least come very close. You may choose to brush the loaf lightly with butter at this point, or not. Since I am baking two loaves today, I will brush one with butter and not the other, so at the end of this article you can see the difference.
 Now the dough must rise. You can simply drape a damp cloth over the pan and leave it on the counter top to rise, or you can cover it loosely with plastic wrap, or leave it completely uncovered, though if you do this you will end up with craze lines all along the crust once it is finished baking, because the crust will have dried out a bit too much, but this is not a terrible thing. It is only a cosmetic problem, and some people like it. The main things to keep in mind for this step is to try to keep the skin of the dough from drying out (if you don’t want craze lines), don’t let the dough stick to anything (sometime it will stick to the damp cloth or plastic wrap. You will just have to develop a feel for it and learn how to avoid it), and the warmer the dough is, the faster it will rise, though a slow rise in a cool room is just fine. So whatever your style, set the dough aside to rise.
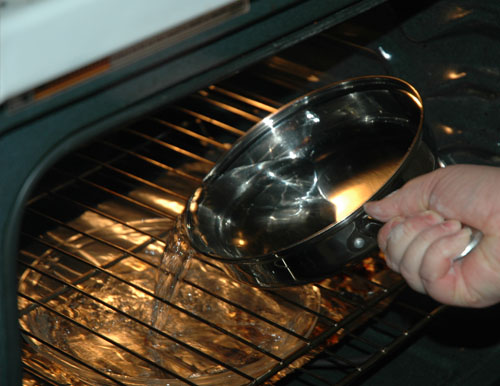
What I often do, is boil a bit of water, pour it into a pan in the oven (turned off but with the light on) and put the dough into the oven to rise. I do not cover the dough with any plastic or cloth and just let the gentle warmth of the oven and little bit of steam from the hot water keep the dough from drying out and aid in the rising.
The dough is finished rising when it crests over the top of the pan two or three inches. With this method it typically only takes about 20 minutes, but it may take as long as an hour, depending on how you treat the dough during rising.
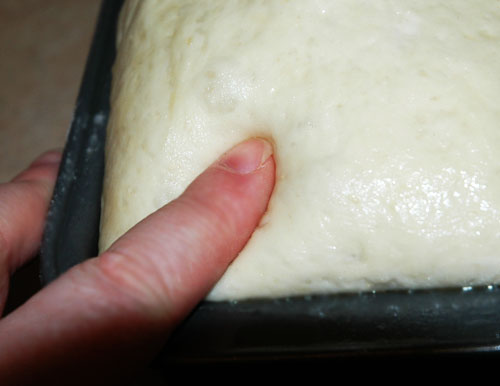
 The best way to tell if the dough is ready is to press a finger into the dough. When you remove your finger the indentation should remain. If this happens the dough is definitely ready. If it fills back in when you move your finger it needs more time.
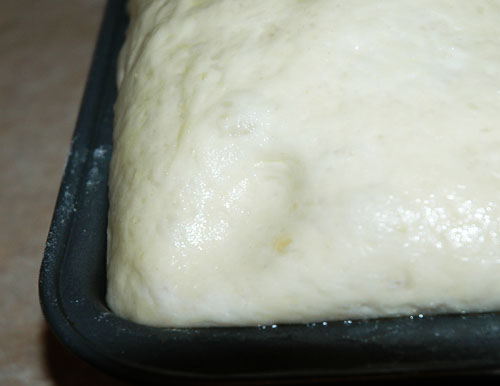
Do not worry about ruining the nice shape of the loaf by doing this. It will plump while baking and it will be like the indentation was never there.
Take all dough out of the oven and set it aside, as you preheat the oven to 375. I leave the water from my rising technique in there. Steam during baking is good for the crust. This is not required, but if you can get some hot water in the oven to steam your bread during the baking then do.
If you want to slash the loaf, now is a good time. Some people like to give their loaf a slash down the middle, or a few diagonal slashes, or some other design. This is totally optional and will not affect the rest of the process, so if this is your desire go ahead and slash the loaf. I typically do not slash pan loaves.
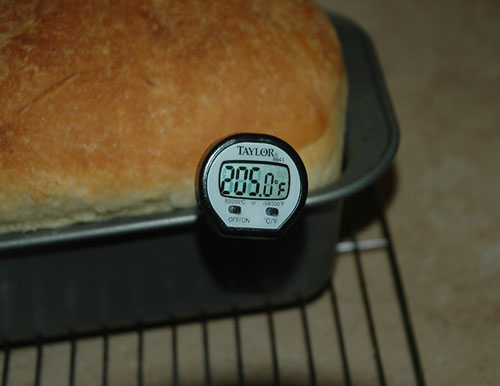
Bake the loaf for approximately 35 minutes. You will know it is finished when the crust is golden brown and when you take the bread out of the pan and tap the bottom and it sounds hollow. The bread should feel light weight. If you have a food thermometer you can be absolutely sure that it is ready by measuring the internal temperature. Anywhere from 194 to 205 degrees means that it is perfect. I like to get closer to 205.
 Take the loaf out of the pan right away. You may give the pan a minute to cool if you desire. Place the bread onto a cooling rack. It is releasing moisture and if you leave it in the pan or place it directly onto a surface the bottom may end up soggy.
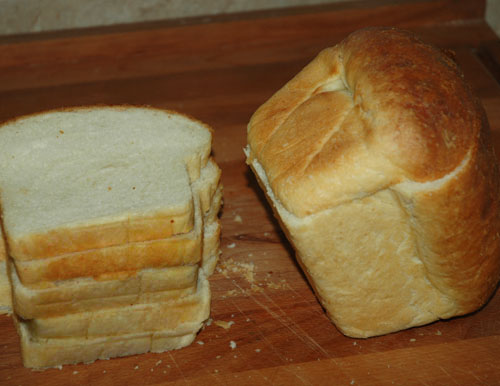
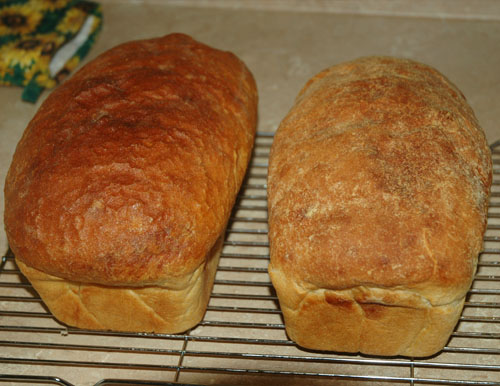
Below you can see the difference between the buttered loaf and the unbuttered loaf. Can you guess which is which?
The only real difference between the two is that the buttered loaf looks a little more smooth and shiny, and the crust may be just a tad more tender. Sometimes I butter, and sometimes I don’t. It just depends on what I feel like doing at the time.
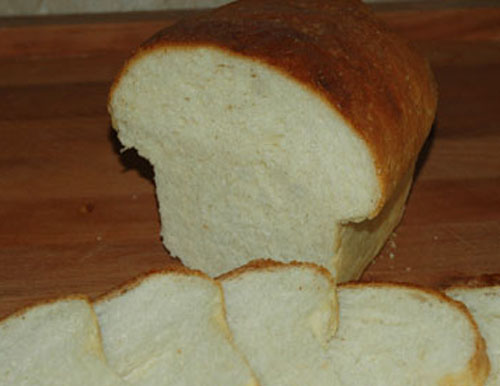
At first the whole loaf may feel like it is rock solid, but as soon it cools you will see that it softens greatly. The crust will have just a little bite to it but not enough to be tough or crunchy, if all went well. The bread itself should have a tight smooth, uniform crumb. Ideally there should be no big air bubbles, but occasionally you will have them. No big deal. This is what will happen if you failed to degas the dough completely before shaping. You can also have gaps if you failed to pinch the ends down during shaping, or did not press everything together tightly.
I know that in the picture it looks like nothing more than mushroom shaped wonder bread. You may be wondering what the big deal is. Trust me this is something you just have to taste to understand how great it is.
You can slice the bread as soon as it has completely cooled. I find that it is easier to slice the next day, but naturally you’ll want little bit right away to enjoy it fresh. I usually just slice as needed and otherwise keep the loaves intact.
I always save the end of the bread when I slice it partially. If I am going to leave the bread out for a while I just cap the open loaf with the end of the bread and that keeps things reasonably covered. I leave it out for hours this way at times.
 For longer storage you do want to protect the bread a bit more, though. If I had a bread box I would just toss everything into there. Since I don’t I wrap the completely cooled bread in plastic, or foil, or just a plastic zipper bag.
Depending on the time of year the bread will last different amounts of time. I find that if it is not too hot or humid it will be pretty fresh for four to five days. If it is not ideal conditions it may start to become less than awesome at around three days.
I really need to get a bread box.

-Printable Version-
SOFT WHITE BREAD PAN LOAF (SANDWICH LOAF)
Ingredients:
approximately 1.5 pounds Soft White Bread Dough
Melted Butter for brushing pans
Method:
1. Flatten and degas the dough
2. Form the dough into a loaf that will fit an 8×4 loaf pan.
3. Brush the loaf pan with butter and place the dough, seam side down in the pan.
4. Set it aside to rise for 20 minutes to an hour, or until the loaf crests over the pan 2 to 3 inches.
5. Preheat the oven to 375.
6. Bake the bread for about 35 minutes. It is done when the internal temperature reaches 194 to 205.
7. Remove the bread from the pans and allow it to cool on a rack.
8. Slice and serve once the loaf is cooled.
Pingback: Soft White Bread Dough | The Cooking Geek()