Jump to Ingredients – Jump to Method – Jump to Printable Version
 Oh the simple pleasures! I love making stock! The simplicity, the aromas, the usefulness of the finished product, it is all such a delight. Anyone who has ever made real, homemade stock will probably agree that store bought stock is a joke. It cannot possibly compare to this glory.
Beef stock is the second most frequent stock that I make. For me it is a little less convenient than chicken stock, since I often buy whole chickens and, therefor always have a supply of chicken bones and cuttings with which to make stock. Beef stock requires beef marrow bones, which I have to actually buy special. Now, there are some cuts of beef that include bones, and some of them even have marrow in them (like Beef Chuck Arm Steak). If you use these cuts of beef often and save the bones, then you can make your stock with those. Since I do not, however, I must buy my bones from the butcher. So I make it a little less often, but one of the things that I absolutely love about making beef stock is that the marrow bones render so much fat! I get five times the fat out of one batch of beef stock than I do out of a batch of chicken stock. Remember, stock is not the only thing you get out of making stock. That fat is just as valuable! Lately I have been more careful about the chicken that I use, and I have found that healthier chickens have much less fat than typical grocery store chickens, and their fat has a different quality. Typically, chicken fat, when cooled, has a texture similar to butter (ditto with beef fat), but the healthier chickens often leave me with fat that stays mostly liquid under refrigeration and even stays soft in the freezer! And since I get so little of it from the healthy chickens these days, I consider my occasional batches of beef stock a rendered fat jackpot.
This is another “non-recipe” recipe. Amounts are fairly arbitrary. When making stock you don’t usually count or measure your ingredients, but I do so for the purposes of this guide. If you do exactly what I do here, you will end up with perfect stock, but don’t feel that you must be exact. When making this guide, I ended up with about two quarts (liters) of beef stock. Your results will vary depending various factors.
-Ingredients-
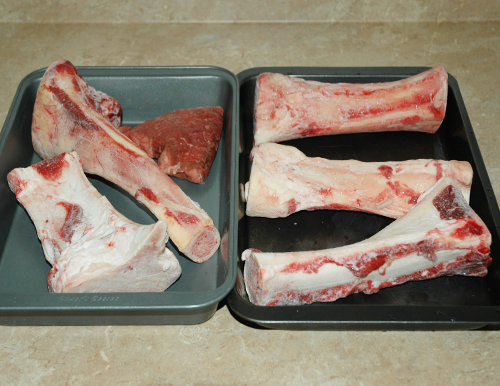
5 Long Beef Marrow Bones
My butcher usually cuts the marrow bones a bit shorter than this. I prefer them that way simply because they are easier to deal with. They fit in the pot better and there is more surface area exposed during cooking. Though it really does not matter. As long as you can fit the bones into your stock pot the size is unimportant. So today instead of using about 20 short cut bones, I am using these long beautiful bones.
While it is important for at least some of your bones to contain marrow, they do not all have to. My butcher usually has some knuckle bones and other bones that contain no marrow and I usually use some of them too, but this time he didn’t. These are all great for stock! If you are using bones from steaks, you can use the arm bones from your beef chuck arm steaks, since they contain marrow, but don’t forget to save any other bones you come across, such as t-bones. Also feel free to use any trimmings of fat or meat that you have. You can see in the picture that there is a piece of steak in one of the pans. That is a steak that has been sitting in my freezer for a while and I don’t feel I will use it any time soon, so I am just adding it to the stock pot. Meat is optional, so use it or don’t, it does not matter!
If possible, use grass fed beef bones. I always aim to but don’t make a big fuss if there is non available. It is best to use meat and bones from the healthiest animals that you possibly can, for your own health as well as the animal’s well being, but I am not going to preach here.
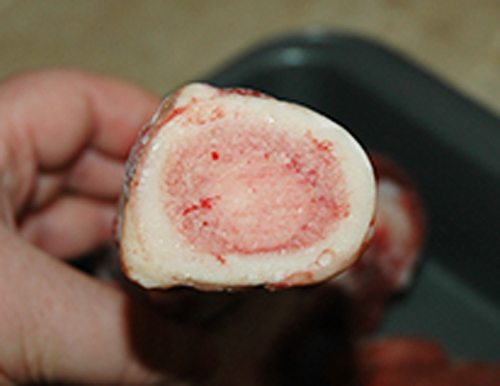
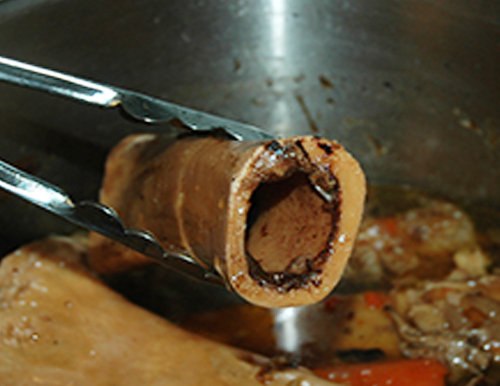
 Here is a close up of the marrow, just in case some of you are not sure what to look for. It is a soft fatty material inside the bone.
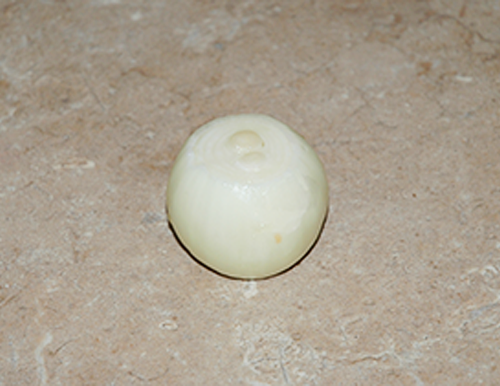
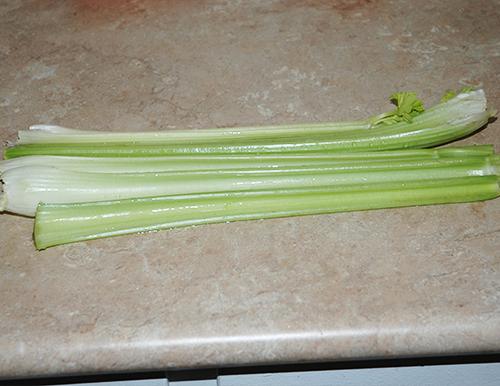
Or equivalent. Also, all vegetables are optional. You can make stock purely with bones if you wish, but veggies add flavour and colour. I usually add vegetables, but not all the time. I typically prefer it. You may use more or less than this as you please.
Or more or less as you desire.
Again, this is just what I am using today. You can use more or less as you see fit.
 Water
Water
As much as you need.
-Method-
If your bones (and meat) are frozen, thaw them before beginning. You can simply let them sit out in room temperature for about an hour. Even if they are not completely thawed by then, they are thawed enough.
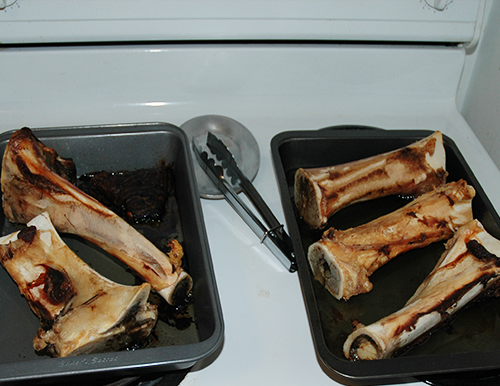
Put the bones into a baking dish or roasting pan that is at least an inch deep. Place them, uncovered, into a 400 degree oven for 45 minutes to an hour, or until the bones are nicely browned. While roasting, they will render a lot of fat, which is why you want a rim on the pan.
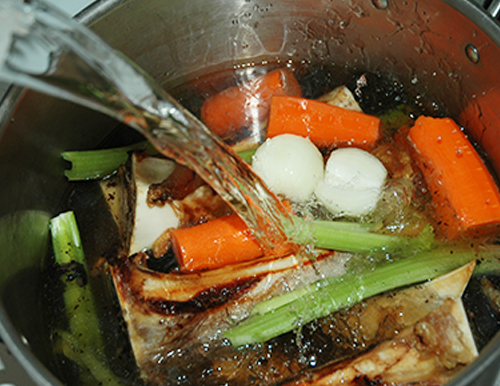
 Clean and roughly chop (or just break in half) your vegetables and place them, along with the browned bones, into a large stock pot. Add enough water to cover everything well. Turn the heat to high and bring the water up to a boil.
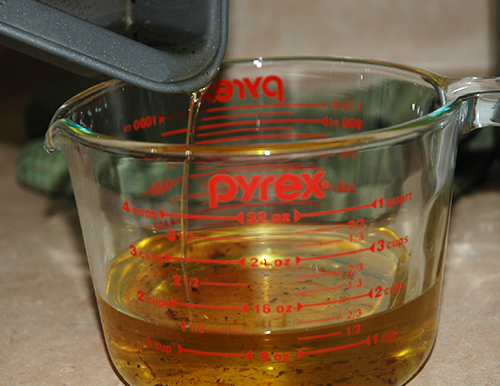
 While the water is coming up to heat you can pour the rendered fat from the baking dishes into a jar or cup, or whatever you would like to use to hold it. For now I am pouring it into a measuring cup. See what I mean by “fat jackpot”? A cup and a half just from the roasting! There is still a whole lot more that will be rendered in the stock pot.
 I feel that I should address a couple of things that are common in beef stock recipes that I am leaving out.
For some reason, many beef stock recipes include tomato paste. I do not include it. The reason I do not is mainly because I like my stock to be very simple. I am sure a small bit of tomato paste will not over power the flavour of the stock and surely will only add richness, but to me it is unnecessary to add it to the beef base. If I am using my beef stock in a recipe that requires tomato flavour, I will add tomatoes during the preparation of the dish. It is purely a matter of personal preference, so if you desire you may add about a tablespoon of tomato paste to your simmering beef stock. I just don’t see the point.
Another thing that I do not do is deglaze the baking pan with red wine and add it to the stock pot. After roasting, the bottom of the pan will be coated with burnt bits of… stuff. After pouring off the fat, if you put the pan on the stove, and pour in some red wine, and stir and scrape the red wine around, it will loosen most of the burnt bits. This red wine and burnt stuff mixture is often added to the pot. The reason I do not do this is, despite claims to the contrary, I find that adding the burnt stuff does not add a pleasant flavour. It adds burnt flavour. There are parts of the meat and bone that are nicely caramelized from the roasting process. This is all you need to give the stock a nice deep roasted flavour. Adding burnt flavour only ruins it in my opinion. Also, even though the flavour of the red wine pretty much cooks out, it is yet another complication that I simply find unnecessary. Red wine can be added to dishes as you are making them. It gains you nothing by adding it to what should be a simple beef base. Again, this is my preference, so if you would like to do the extra step of deglazing the pan, as I have already explained how, then go right ahead. Just don’t blame me if the stock tastes burnt!
Moving on…
Once the water comes up to a good boil, immediately turn the heat down to a low enough heat that the water will maintain a low steady simmer. All you have to do for the next 12 to 24 hours is maintain this simmer. You should also give it a quick stir every couple of hours. No need to be fussy about it. Unlike when making chicken stock, there will not be a lot of foam that appears atop the simmering stock. There may be a little and if you want to skim it for the first hour or so go ahead, but it is not necessary and you may not even get any scum. After about an hour you can totally put it out of your mind.
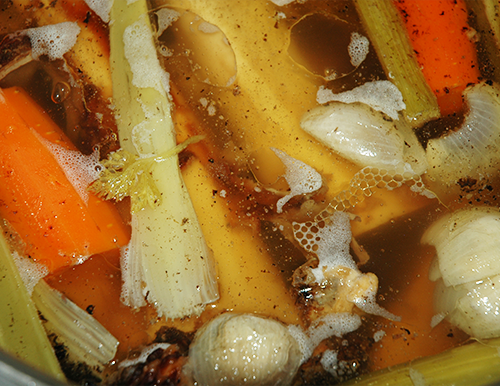 Exactly how long you simmer the stock is up to you. The longer you simmer, the richer it will be. While I would say the minimum time for chicken stock would be about 6 hours, I think that I would not go any less than 12 hours for beef stock. Personally, I tend to aim for around 24 hours when I make beef stock.
If the water reduces to a point that a lot of the ingredients are no longer covered, and if you still want to simmer the stock for more time, add enough water to cover everything. You may have to turn the heat up briefly to bring back the simmer and then turn it back down to maintain the simmer.
For the amount of bones I used in today’s batch, two liters of stock is a good amount to aim for, so rather than counting the hours exactly, I just let the water reduce slowly until there is around two liters of water left (I can eyeball it because I make stock a lot, don’t let all this precision worry you, there are crazy amounts of leeway here), and at that point if it has been anything close to 24 hours, I consider it done. If it gets to that volume way before 24 hours, like at the 12 hour mark for example, I’ll add a bit more water so that it can continue to simmer and reduce.
I hope you get the idea that there is no science to it. Simply simmer for a long time, let the water reduce quite a bit, and you will have lovely stock. Don’t worry about it!
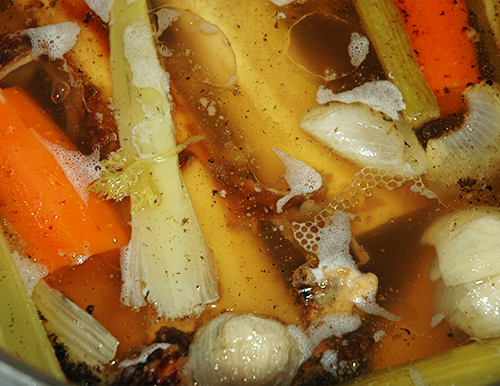
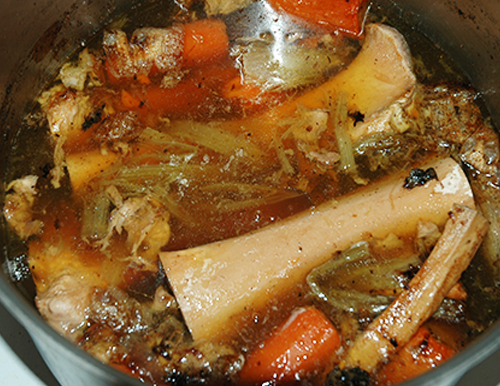
Below you can see my stock, after about 24 hours of simmering. It is ready!
When you are finished simmering your stock remove the bones. You will notice that the marrow is completely washed out and you are left with totally hollow bones. You may now discard the bones.
Once the bones are removed it will be much easier to strain the stock. So strain it into a big bowl or pot, or whatever you wish.
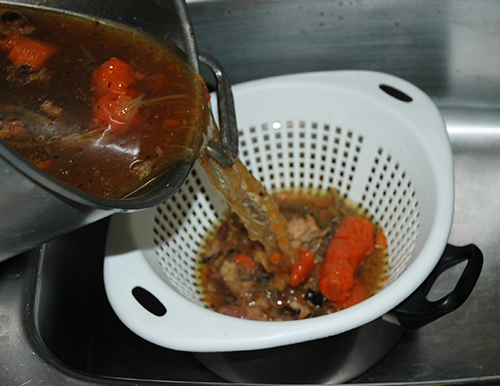 I usually do my straining in two steps. First, as you see above, I strain out all the big chunks, and then, as you can see below, I strain it again through a fine mesh strainer to get more of the small impurities out. This is as far as I take it, but some people like to go even farther and strain it through cheesecloth or coffee filters to get every last bit of impurities out (or they do the egg white technique). It is up to you to decide how much you want to strain your stock.
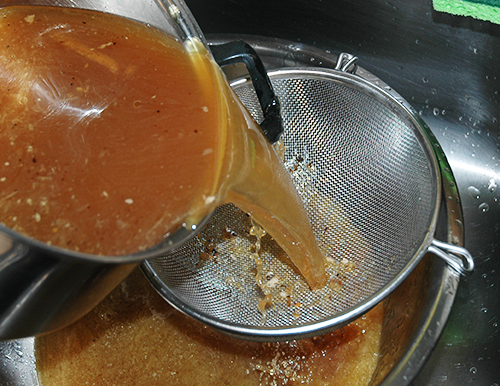 Your stock is now ready for use! You can use it now for any recipe requiring beef stock, or you can store it in the refrigerator, or freeze it in ice cube trays for handy frozen stock cubes. Remember that there is a layer of fat over it so if you are going to freeze it, first you should skim off the fat. If you refrigerate it, it is a good idea to keep the fat in place, because it solidifies and seals the stock in the jar (or pot or bowl, etc), keeping it fresh for longer.
Whatever you do, if you are not going to use it right away while it is still hot, it is a good idea to cool it as quickly as possible. This step is not critical, but it is a good trick to cool the stock quickly, so that it will not warm the refrigerator, or so that it does not have to set out for a long time in “danger zone” temperatures.
As long as the temperature is brought down to at least room temperature by two hours, and then put into the refrigerator, it should be fine, but, especially if you have made a large volume of stock, sometimes it will not cool quickly enough on its own. To speed the process along, you can fill your sink or a larger pot with cold water, enough so that when you place the pot with the stock into it, it comes up the sides at least to the level of the stock. Stir the stock every few minutes and just let it sit in the cold water for 10 minutes to a half hour or how ever long it takes for the stock to become tepid. It will cool much quicker this way. Then you can put it into the refrigerator.
I refrigerated the stock in a pot so that I could demonstrate a few things.
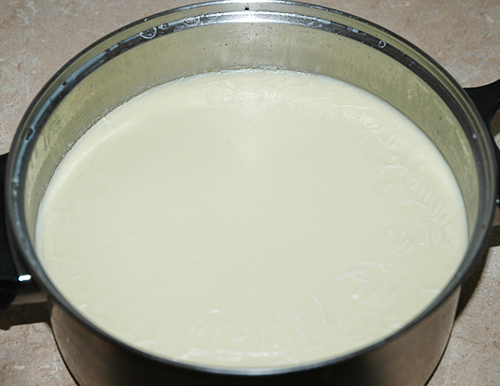 The fat layer peels off easily. It is much easier to remove the fat this way than it is to remove it by skimming.
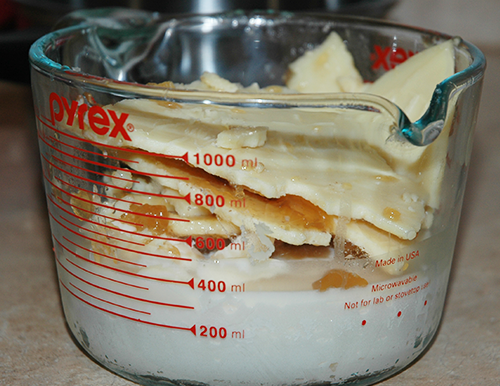
 I put all of the removed fat into that same cup that I poured the rendered fat into earlier. You can get an idea of just how much these bones have blessed me with. In another article, I will go into more detail about what to do with this fat.
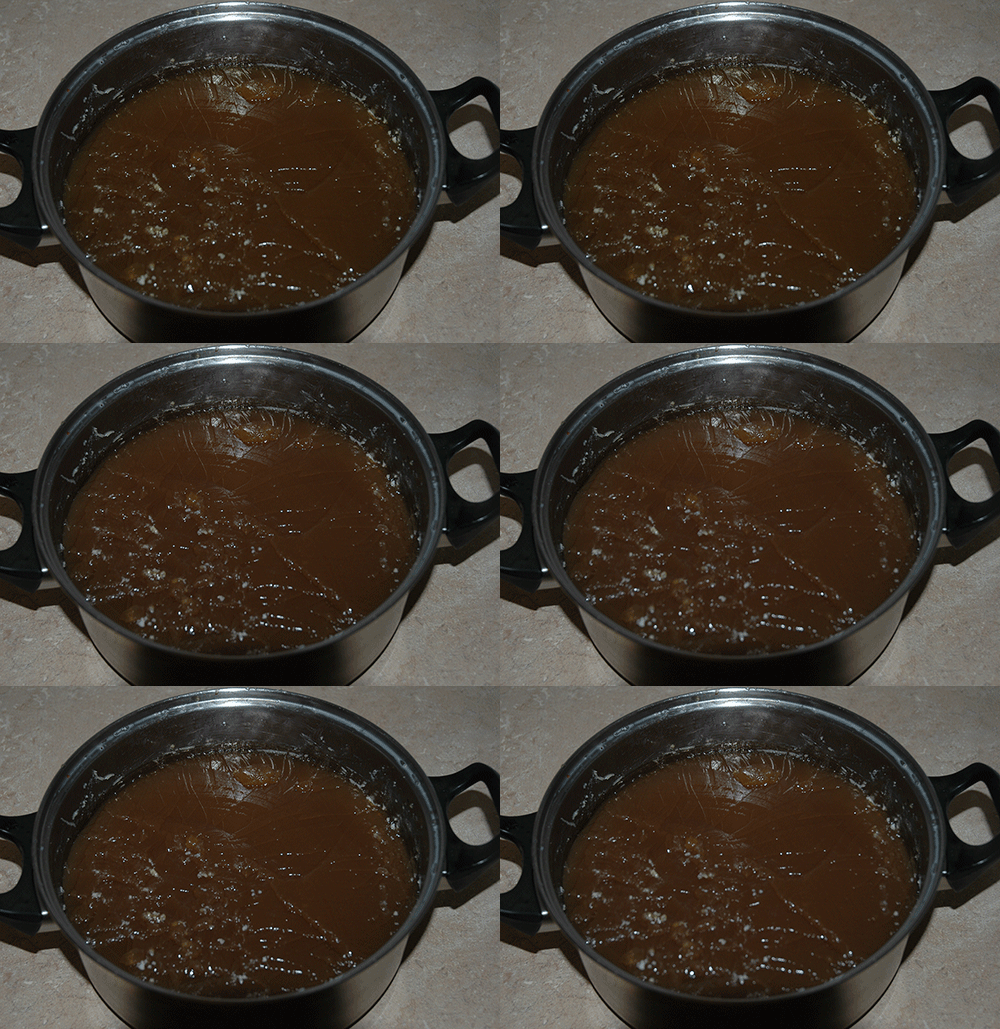
 I neglected to make clear in my chicken stock article just what the cooled stock should look like. So here I prepared a little GIF by jiggling the pot and taking a bunch of pictures in quick succession, then I edited them together to try to illustrate just how solid and gelatinous perfect stock is. Any bone stock that you make from any animal should literally be meat jello. This is the holy grail of stock. If yours is not quite this rich, do not fret. It probably just needed to be reduced a little more. After making stock a few times you will get the hang of it.
Also, if you are not familiar with gelatinous stock, I assure you, the moment it is heated even a little bit, it liquifies again. Your soup will not be like jello unless it is cold from the refrigerator.
 And a big chunk of beef jello on a spoon, to further give you a sense of how solid it is.
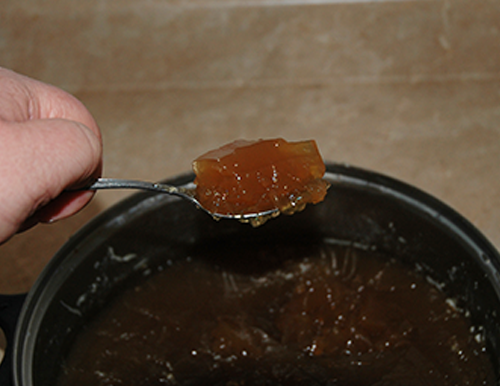 The gelatinous quality of stock is caused by collagen that has been extracted from the bones (and cartilage and skin, if applicable) forming a solid matrix. This allows you to make thick demi glaces and glaces by greatly reducing the stock. It also allows for you to make stock cubes (not ice cubes made of stock, but actual stock cubes). I have already posted the recipe for my chicken stock cubes and even though it is the exact same process, I will soon post the recipe for beef stock cubes, just to be fair. This entire batch of beef stock was made with the stock cubes in mind, so instead of using this stock in some other recipe, as is, I am going to go on to turn it into stock cubes.
-Printable Version-
BEEF STOCK
Ingredients:
5 Long Beef Marrow Bones (or equivalent)
3 large Carrots
5 Stalks of Celery
1 baseball sized Onion
Water
Method:
1. If your bones are frozen, thaw them before beginning. You can simply let them sit out in room temperature for about an hour. Even if they are not completely thawed by then, they are thawed enough.
2. Put the bones into a baking dish or roasting pan that is at least an inch deep. Place them, uncovered, into a 400 degree oven for 45 minutes to an hour, or until the bones are nicely browned.
3. Clean and roughly chop (or just break in half) your vegetables and place them, along with the browned bones, into a large stock pot. Add enough water to cover everything well. Turn the heat to high and bring the water up to a boil. (if desired, reserved the rendered fat from the baking pans)
4. Once the water comes up to a good boil, immediately turn the heat down to a low enough heat that the water will maintain a low steady simmer.
5. Maintain a gentle simmer for the next 12 to 24 hours, stirring every few hours. If desired, for the first hour of simmering, monitor the pot for foamy scum. If any appears you may skim it off. It will not harm to stock (beyond possibly making it a little more cloudy)if you fail to skim it, however. If the water is reducing too quickly you may add water at any point.
6. After 12 to 24 hours, and when you have roughly 2 quarts (liters) of liquid left, remove the bones and strain the stock.
7. Use the beef stock right away or store in the refrigerator for a couple of weeks, boiling it for a few minutes every three days to maintain freshness.



Pingback: Beef Stock Cubes | The Cooking Geek()
Pingback: Rendering Fat (and cleaning it) | The Cooking Geek()