Jump to Ingredients – Jump to Method – Jump to Printable Version
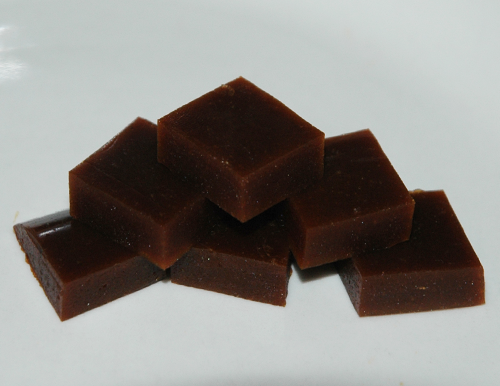 I never liked using bouillon cubes. The concept is great; to have little magic bullets of flavour on standby, ready to be tossed into anything that you are making is really convenient. The problem is, most commercial bouillon cubes are more salt than flavour, and a lot of them have the dreaded MSG as an ingredient. Also, unless you are careful you may end up with little salty clumps in your finished product, and that is never a pleasant surprise.
Years ago, I found a product that I preferred to bouillon cubes called “Better Than Bouillon”. It is basically a salted demi-glace (or greatly reduced stock). This was a great find because it generally tasted better than bouillon cubes and always dissolved completely. They were still very salty, however, which wasn’t really a problem as long as I was careful about adding additional salt to the recipe, but sometimes it is just too much for whatever it is being used for. Also, Though the package says “No added MSG” I have heard that this is a clever way of hiding the fact that there is some MSG in there, but I forget the explanation. I am not sure if this is true, but I would not be surprised.
My discovery of these stock cubes, however, preceded the revelation about the possible MSG in BTB, and came about, as so many of my eureka cooking moments do, because of my move to Canada. BTB is not impossible to find here, but it is very difficult. It was especially difficult in the beginning because I lived in an out of the way town with one little tiny grocery store that only had the very basics. Whenever I made chicken stock, I would reduce it down a great deal and then freeze it in ice cube trays, and use the cubes in place of bouillon. This was a very good solution because, being homemade, it was a lot healthier and it allowed me to control the salt content of my recipes more easily. The downside was that all those cubes take up a lot of freezer space and, if you don’t use the cubes within around two months, they start to frost and get a “freezer flavour” to them. Also, Even though I reduced them a lot, there was still quite a bit of water in them, meaning that whatever I added them to would become more watery, which may or may not matter for the recipe, but sometimes the extra water gets in the way. I still make these chicken flavoured ice cubes if I know that they will be useful to me within about two months, but there are certain situations when you really just want to add chicken flavour without adding water. One day I decided to try to mimic Better Than Bouillon. I reduced a stock down to a very thick demi-glace kind of consistency, and added a lot of salt. I added the salt thinking that it would help preserve the stock so that I can store it in the refrigerator in a little jar just like BTB. But I was still annoyed by the salt. I thought to myself, why not just leave the salt out and freeze the demi-glace? The next time I made Stock that is exactly what I did. I froze it in a little plastic food container, similar to the one that I am using in this tutorial. When I took it out the only problem was that it was difficult to cut into little pieces because it was frozen. Also, after storing it in the freezer for a couple of months, it also frosts over because even though a demi-glace is very condensed, it still has a bit of water in it. Finally, I decided to simmer the stock past the demi-glace stage and remove as much water as is humanly possible. That was it! The perfect solution!
These stock cubes add unbelievable flavour your food. They keep practically forever in the freezer, take up no space, and don’t even grow frost and get “freezer flavours”. They are easy to handle too. They are not sticky or gummy even at room temperature. In fact, since there isn’t any water in them they are the same texture directly out of the freezer as they are at room temperature. They dissolve easily and perfectly when you cook with them. You just throw them in to whatever you are cooking and stir a little and in no time they are gone, and there is no extra water added to the recipe. They also add gelatin to your food, just like chicken stock does, since it is chicken stock, which is a very good thing! That is something you will never get out of a store bought bouillon cube or flavour powder packet! Of course you can also control the salt in the recipe with these since there is no salt. These are just so many thousands of times better in taste and in healthiness than bouillon cubes! I was so proud of myself for inventing these until I found out that this is a common trick done by professional chefs. Oh well, so it is a rediscovery, I can still be proud!
This is a method and not really a recipe. Amounts of all ingredients can be whatever you want them to be. All vegetables are optional. Some people like veggies in their stock and others don’t. The only things you absolutely need to make these are water and chicken scraps. With the amounts that I used in the following tutorial I ended up with 16 approximately teaspoon sized stock cubes. If you read my regular chicken stock recipe you may notice a couple of differences, but that is because you don’t have to make chicken stock exactly the same way every time. You can just as easily make stock cubes out of that, or any other stock recipe.
-Ingredients-
Chicken Scraps
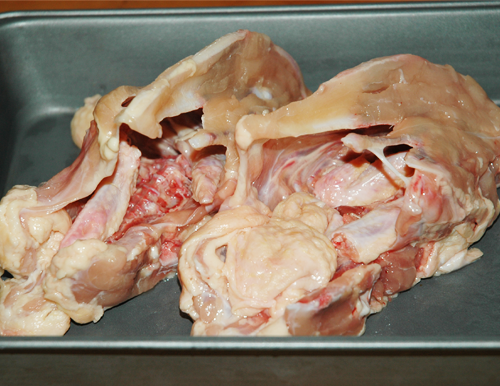
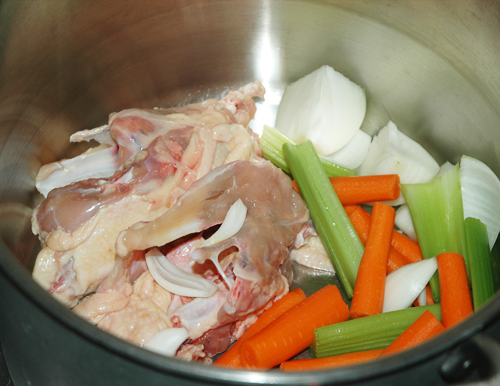
I am using two raw carcasses with their wing tips since I just got finished removing all the meaty goodness from them. You can use the scraps from a roasted chicken if you like, only make sure that any flavours that it was roasted with are flavours that you would want in your stock cubes, for instance it is probably not a good idea to use barbecue chicken scraps. You can use any part of the chicken that is, or contains, bones and cartilage. It is also helpful for there to be skin since there is a lot of collagen in it, which is the stuff that makes up the bulk of these cubes. The more joints you can add, the better, as well. Any joint is great but necks and backbones are gold. Meat is optional. As you can see, most of the meat is gone on my chicken scraps but the little that is there will add some flavour which certainly can’t hurt when you are trying to create a flavour bullet, like we are here.
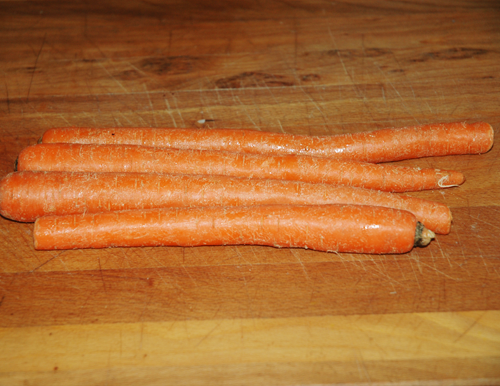
Carrots
-Method-
Clean the veggies and chop them roughly. Put all the vegetables and chicken scraps into a big pot.
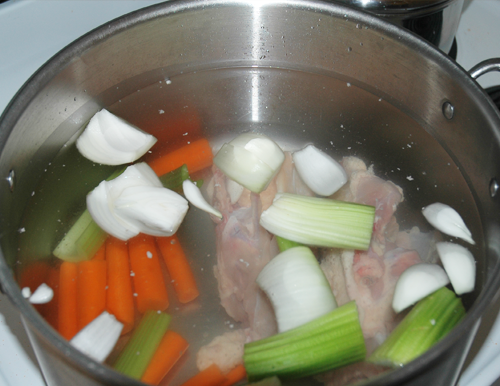
Add lots of water to the pot. The exact amount does not matter. Realize that this is going to be simmering for many hours so the more you add the longer you can simmer without adding more water.
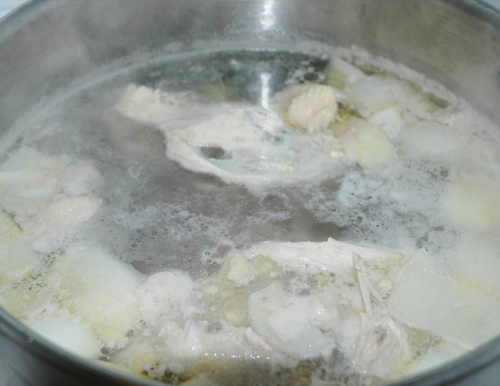
Bring the water up to a boil. As soon as it reaches a nice boil turn the heat down low enough to maintain a gentle simmer. You should see just a few bubbles popping up occasionally. If there are no bubbles then the temperature is too low, and if there are lots of bubbles popping all over the pot it is boiling. You want it somewhere in between. For the first hour of simmering, if desired, skim off the foam that forms on top of the water. This is just proteins and can be left in if you like but they tend to make stock cloudy, not that that matters for these cubes, but I am simply in the habit of skimming a little. Also, I rarely use a whole batch of stock to make cubes. I often just turn about half of a batch into stock cubes, so I want the rest of the stock to be up to par. Like I said though it is optional; so skim or don’t.
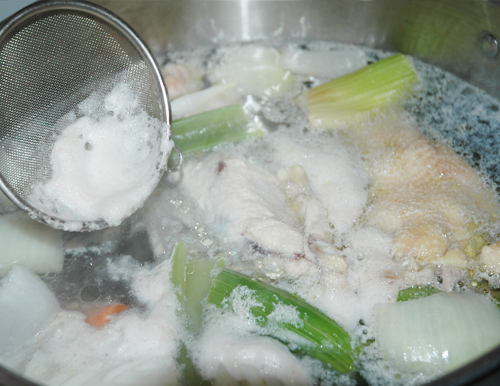 After about the first hour of simmering you should be able to pretty much ignore the stock for the rest of the time. You should have found the simmering sweet spot by now and if you are skimming there is not much need to continue beyond this point, even though there may still be a little foam that collects, unless you are after some kind of 5 star restaurant quality crystal clear stock, but this is home cooking. No need to go nuts here. You can simmer for a minimum of 6 hours or up to 24 hours. Really, you can simmer for longer if you want, but there comes a time when it is just time to end it! Anyway I tend to aim for around 10 to 20 hours. Basically, since I add a lot of water in the very beginning I just let it go until I am left with around two liters or less of liquid. If you added less water than I did in the beginning and your are running out of liquid before you want to stop simmering the stock simply add more water. Just make sure that you bring the heat up until you reach a steady simmer again, and drop the heat back down to maintain the simmer.
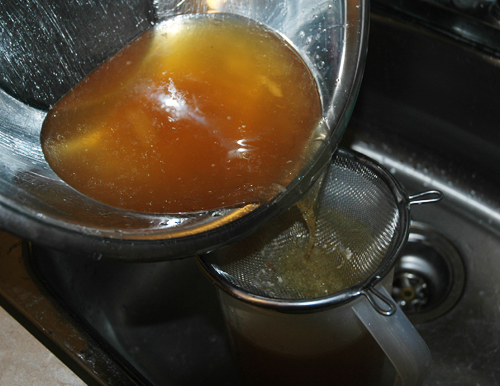
When you feel it has simmered enough, strain the stock to get all the big chunks out.
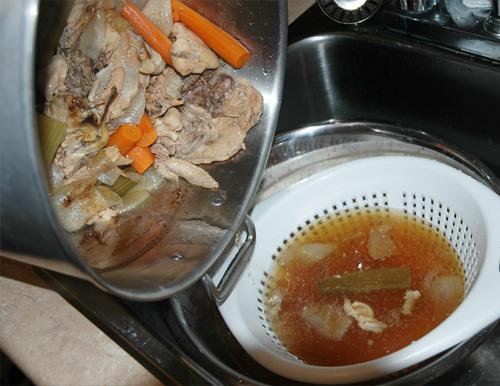 If there are still noticeable impurities in the stock then strain it again through a fine mesh strainer, or cheesecloth, or a coffee filter.
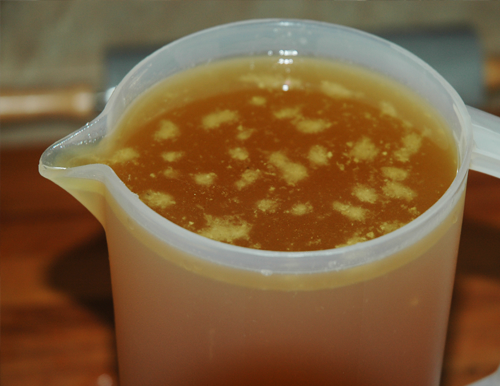
Woooah! RIGHT to the top! haha. I probably could have simmered it for another hour to reduce it a bit more, since it is a tad more than my typical two liter or less goal, but it really doesn’t matter! As long as it fits in the pitcher it is fine.
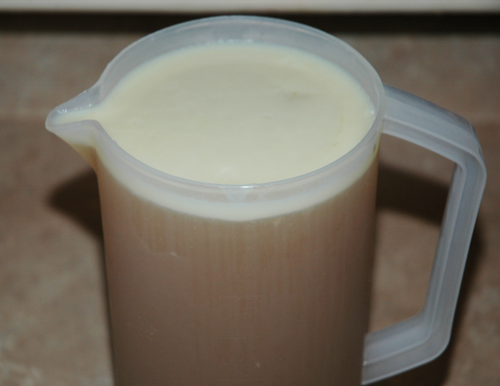
So at this point in the recipe I tend to cool the stock and refrigerate it over night. I do this mainly because I like to let the chicken fat solidify on top of the stock so that it is super easy to take off and save for other uses. Also, I like to see just how gelatinous I managed to make my stock. Sometimes it comes out completely solid like thick jello and sometimes it is more of a semi chunky looking liquid Either result is just fine! Though, the more gelatinous the better! It is just really satisfying to see a whole batch of chicken stock completely solid and jiggly. The more gelatin you have managed to extract from the chicken, the more chicken stock cubes you will end up with too. I totally forgot to take a picture of my gelatinous masterpiece. I swear I will next time!
Anyway, the refrigeration step is optional. The important thing to do at this point is to remove all of the fat from the stock. You may have a fat separator, and if you do then you can just use that to immediately go on to the next step. If you do not, skillful skimming may do the trick. Just make sure to get absolutely all the the fat off of the stock before continuing.
Now you must put the cleaned stock back onto the stove. Put it into the smallest pot that you have that it will all fit into. Bring the stock up to a good boil.
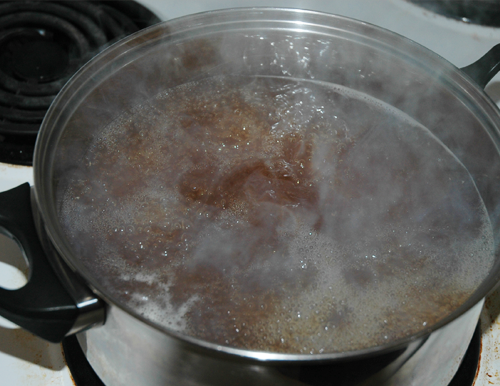 Lower the heat just a bit so that it will boil gently. You do not want it to continue at a rolling boil, but you also do not want to simmer it as gently as before because this process will simply take a lot longer than it needs to. Let it boil gently and give it a stir every twenty minutes or so to make sure it is not boiling too rapidly and not burning the stock on the bottom of the pot. This will also allow you to check the thickness and volume.
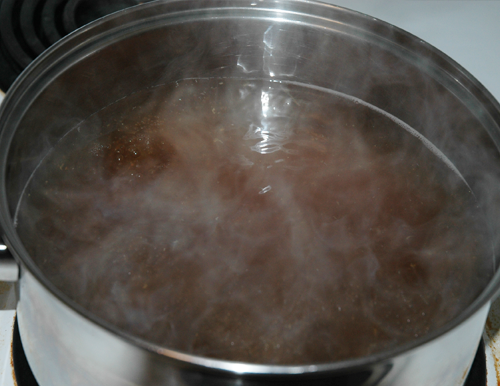 As it reduces over the next hour or so lower the heat as needed to keep it from boiling too much and be sure to watch it more and more closely as the water reduces.
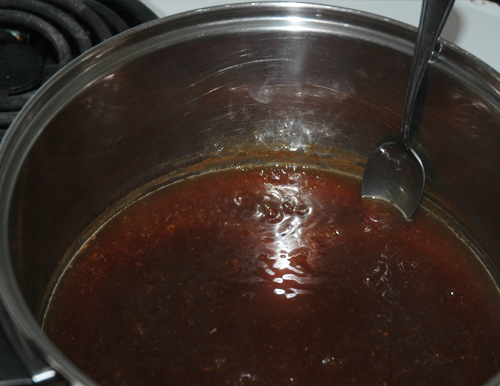
Eventually you will have a pretty thick liquid as shown in the picture. This is the demi-glace. Most of the water is gone by this point. The spoon is touching the bottom of the pot in the picture.
When it gets to this state you should stay with it and keep stirring until it is finished. You can turn up the heat a bit as necessary to speed up the process but make sure you keep on stirring and absolutely do not let the heat get so high that it scorches the glace on the bottom of the pot. The whole time just adjust the heat by feel.
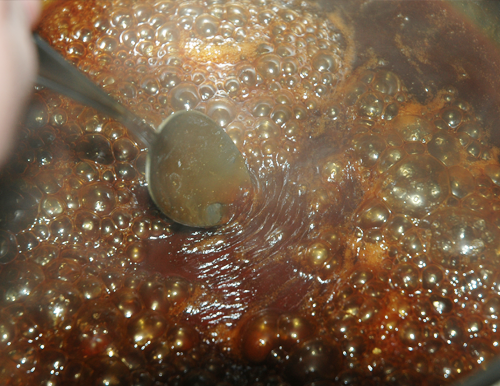
You will notice that even with the heat fairly low, the thicker the glace gets, the more rapidly it will bubble. It is fine if it is bubbling like mad as long as you just keep on stirring and scraping the bottom. It should always scrape cleanly off of the bottom as you stir. If there is any sign of glace sticking to the bottom of the pot it is about to scorch and you should back off the heat a bit.
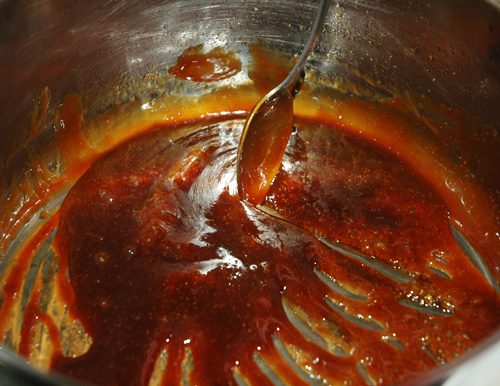
The stock will be becoming thicker and thicker and will resemble caramel. When there is very little steam left you should keep the heat very low to let the last bit of water evaporate without burning the stock goo. Keep stirring and monitoring the steam.
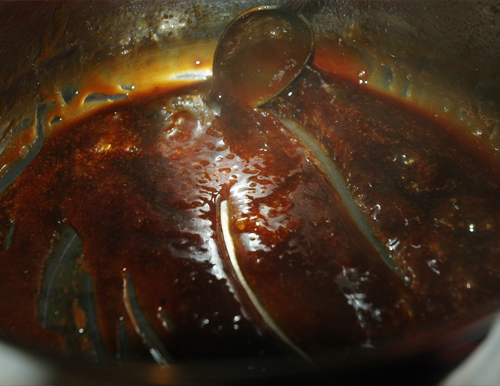 When there is absolutely no steam left it is done! All that you are left with now is gelatin and chicken flavour.
It will be incredibly thick and it will smell amazing.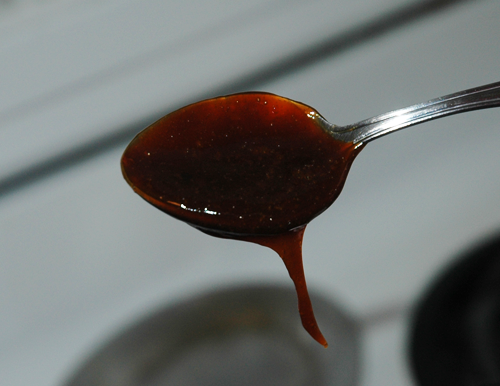
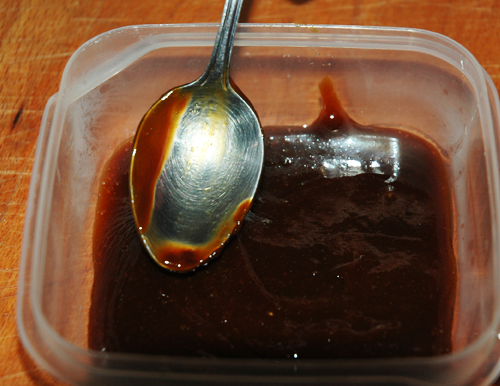
Have ready some kind of mold for the glace. Something that you will be able to remove it from once it has set up and that will give it at least a quasi regular shape so that you can cut it into approximately even slices. I use very small plastic food containers because it can be slightly deformed and allows me to pop out the finished product. I have also used small dishes with a rim with aluminum foil lining it.
The moment that you take the stuff off of the heat it is going to start to set up, so it must go straight from the heat to the dish as quickly as possible. Scrape out every last bit you possibly can, but unfortunately you’ll never get it all out, so do not make yourself crazy. Even with a rubber spatula, it is so sticky it is hard to get the last little bits.
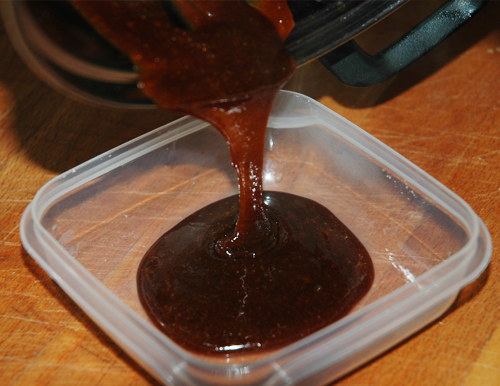 If necessary, smooth it out to get it to set into a nearly uniform thickness. Again, do this quickly or it will become too thick to work with.
Put it into the refrigerator or freezer and give it about an hour to set up. Really, it is probably done way before that, but I usually leave it in for a couple hours because I tend to forget about it.
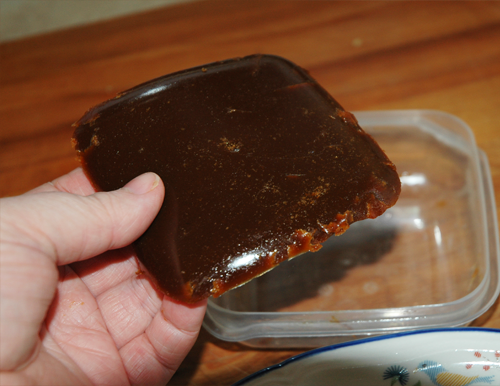
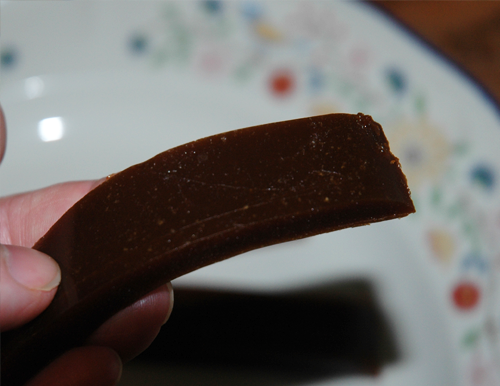
When it is solid it will either be like a hard piece of plastic, or it may end up feeling like a bouncy piece of rubber. I am not sure what causes it to turn out in one state or the other, but either way it is fine. This time I ended up with rubber.
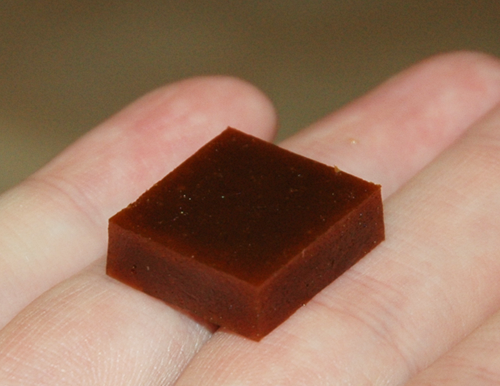
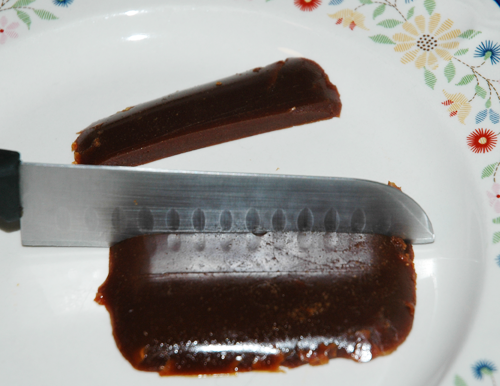
Remove the, um… what should I call it? Stock slab? Remove the stuff from the mold and cut it into pieces. Even if it ended up very hard, do not worry; it still cuts easily. I like to cut it into approximately teaspoon sized cubes. These I use as an equivalent to one store bought stock cube, minus the salt of course.
The finished cubes can be stored in a baggy in the freezer for practically forever. I guess I would draw the line at around two years or so but I really see no reason why they shouldn’t last longer. When you want to use them you can simply throw them directly from the freezer into whatever you are cooking. If you pull them out before you start cooking you do not have to worry about them melting. They will stay the same texture at room temperature as they were while in the freezer. They do, however melt easily when heat is introduced, so have no fear of little chunks being left in your food. If they are simmered for at least a minute they will be completely dissolved.
If you use these in place of bouillon cubes in a recipe be sure to compensate for the lack of salt in these.
I will call for these in recipes on this blog. Often store bought bouillon cubes will be a reasonable substitution, but if you use bouillon cubes in lieu of these in my recipes be sure to watch out for salt! Also realize that the flavour of the finished dish will be inferior than it would be had you used these chicken stock cubes.
-Printable Version-
CHICKEN STOCK CUBES
Ingredients:
Chicken Scraps
Carrots
Celery Stalks
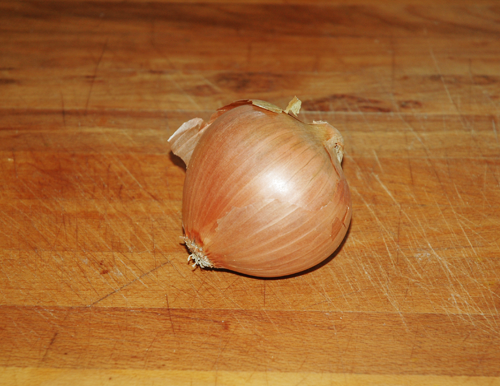
Onion
Water
Method:
1. Clean and wash the carrots, celery, and onions. Chop them roughly into large chunks.
2. Place chicken, vegetables, and parsley into a large stock pot.
3. Add enough water to cover all ingredients well.
4. Bring the water to a rolling boil. Let it boil for just one or two minutes and then turn the heat down to medium to medium-low, or whatever temperature will maintain a very very gentle boil.
5. Simmer for 6 to 24 hours, skimming off any scum that forms if desired.
6. Strain the broth and discard vegetables and chicken scraps. If needed strain it again to remove all small bits.
7. Remove all fat either by skimming, using a fat separator, or refrigerating the stock until the fat solidifies and then simply lift the solid fat off.
8. Boil the stock gently until it is reduced to demi-glace.
9. Stir it constantly until all steam is gone.
10. Pour it into a bowl and chill until solid.
11. Cut the solid chicken stock into cubes.
12. Store in the freezer and use in recipes calling for bouillon cubes.

Pingback: Chicken Stock | The Cooking Geek()
Pingback: Beef Stock | The Cooking Geek()
Pingback: 10 Things to Make in Ice Cube Trays | PreparednessMama()
Pingback: domowe najlepsze: kostki roso?owe - zielony ?rodek()